
Winbox Withdrawal Tutorial: Step-by-Step Guide
This guide follows the withdrawal flow shown in the tutorial screenshots, in order, from opening Withdraw to the screen shown after the request is submitted. Check the details on your own screen before you submit anything.
The screenshots were captured in 2021, so your screen may look different. See if your screen looks different.
Before you withdraw
A withdrawal request starts from an account that already exists, so new users can create a Winbox account first.
- Sign in first. The screenshots start from a signed-in Winbox account. If you need help getting in, see how to log in to Winbox.
- Have your payment PIN ready. One step asks for it before the request goes through.
- Be able to receive a verification code. Adding a bank account asked for an OTP, with Mobile OTP and Email OTP options.
- Have your bank and account number to hand, in case your screen asks you to add a bank account.
The withdrawal walkthrough
12 steps, one screenshot each, in the order the screenshots show them.
Open Withdraw
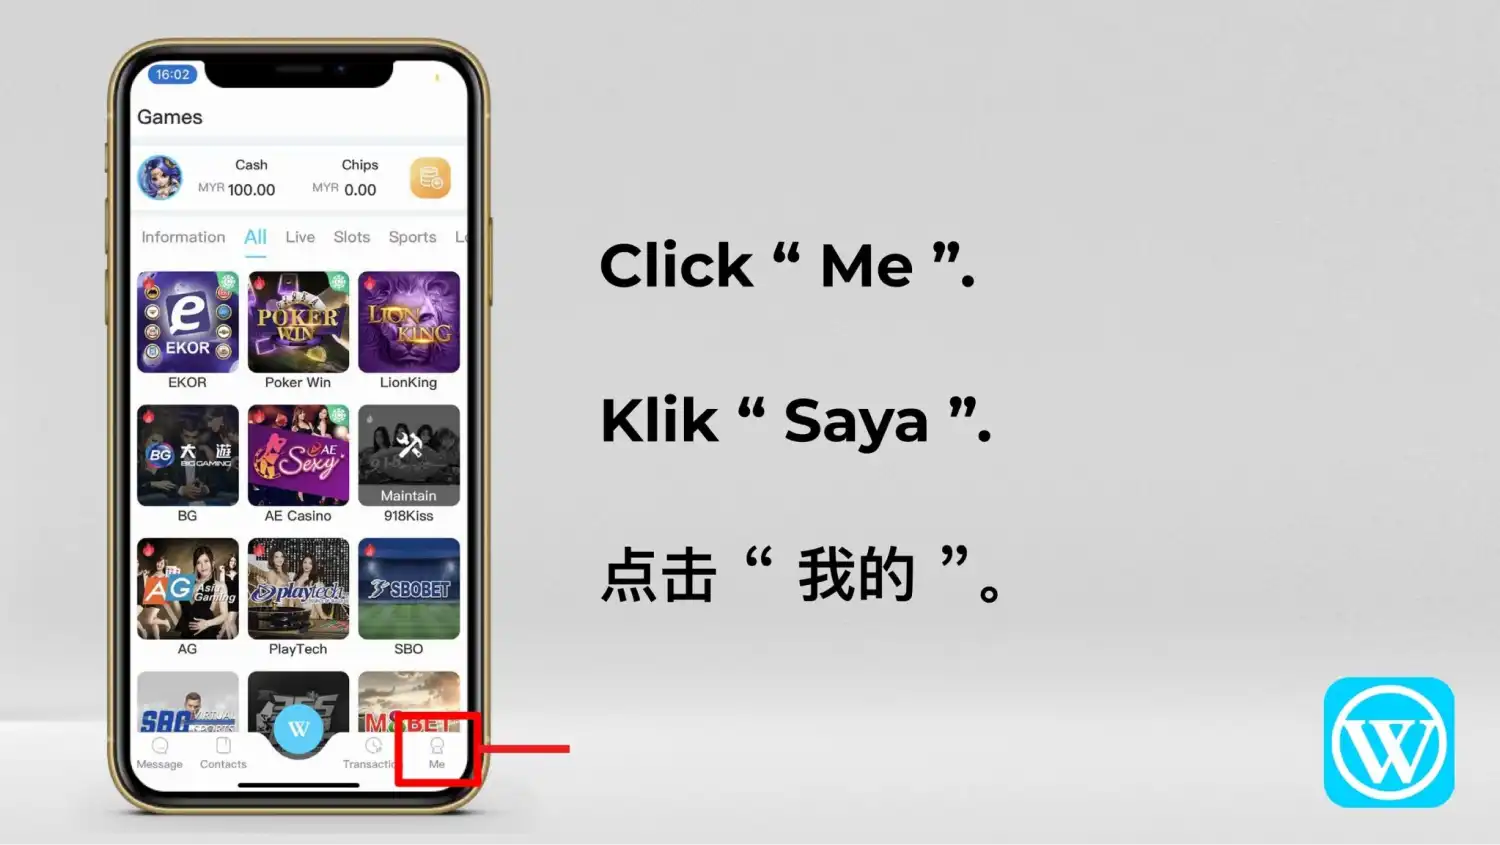
Tap Me
On the Winbox home screen, tap Me in the bottom bar. It is highlighted in the screenshot.
Open Top up / Withdraw
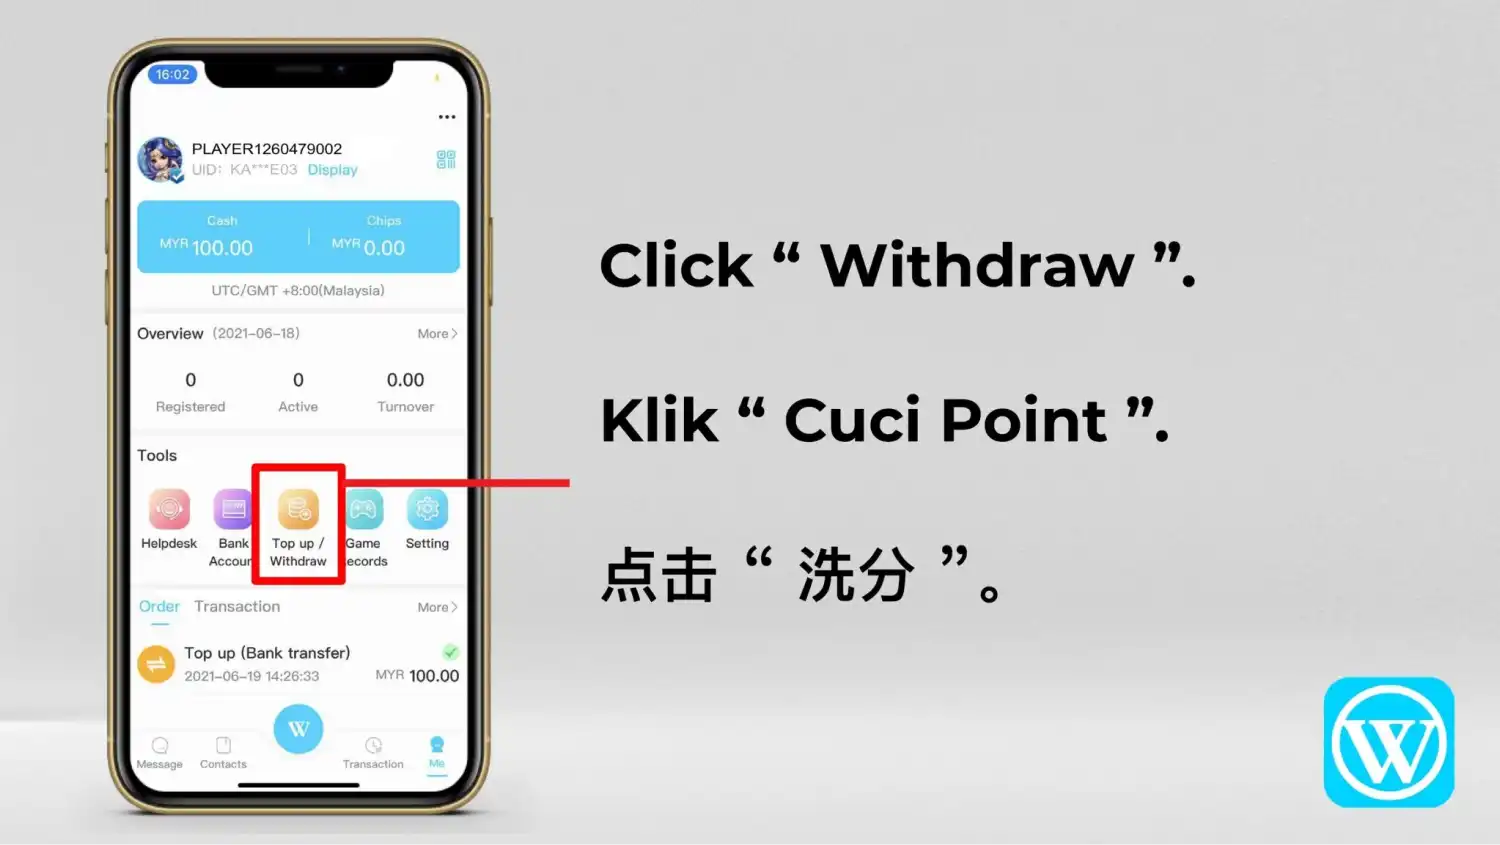
On the Me screen, open the Top up / Withdraw tool in the Tools panel.
Choose Withdraw
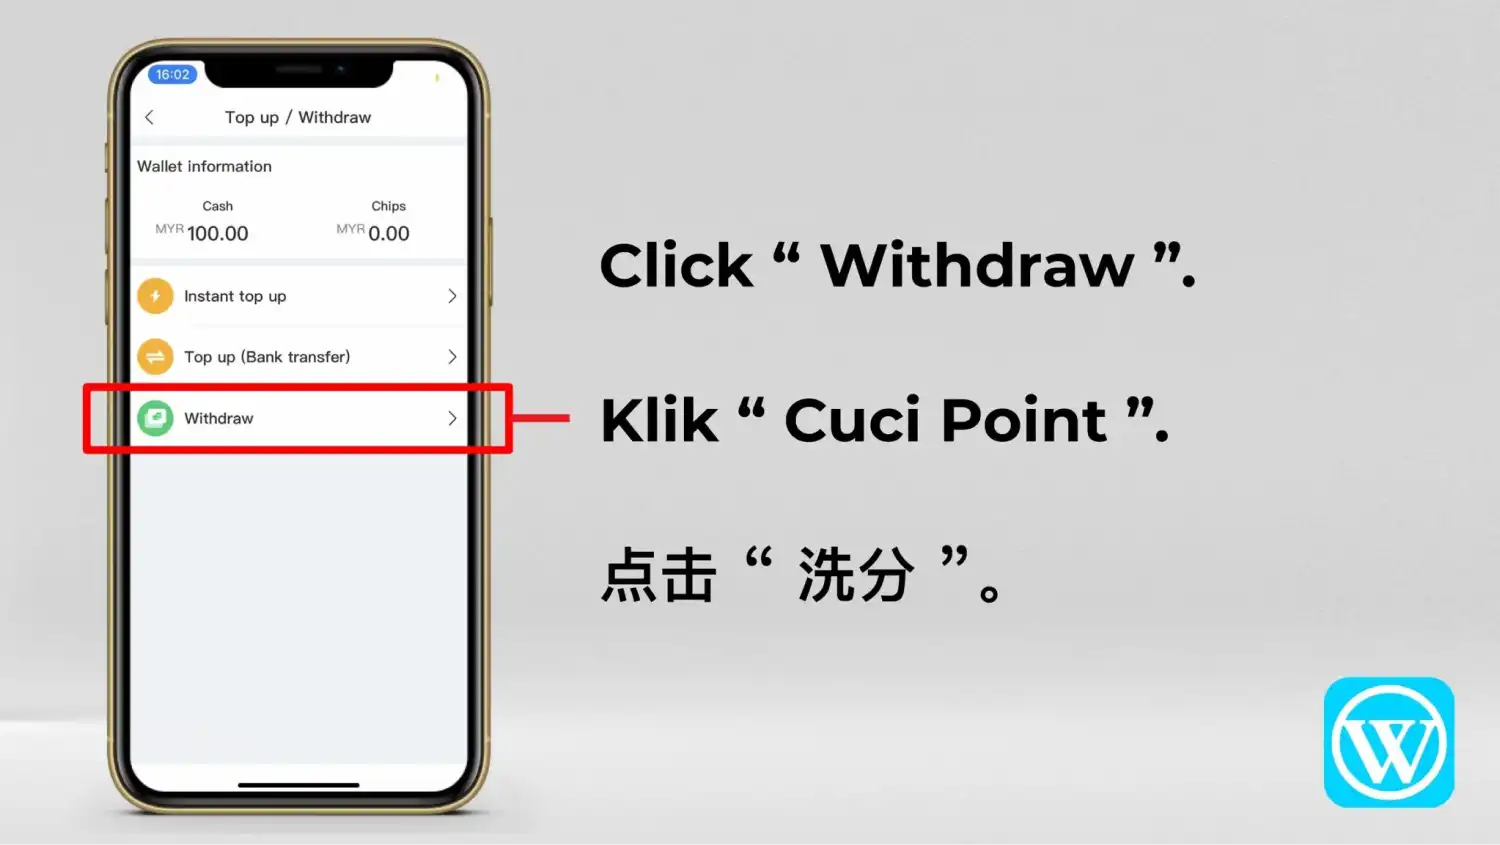
The Top up / Withdraw screen lists Instant top up, Top up (Bank transfer) and Withdraw, under a Wallet information panel. Choose Withdraw.
Add a bank account
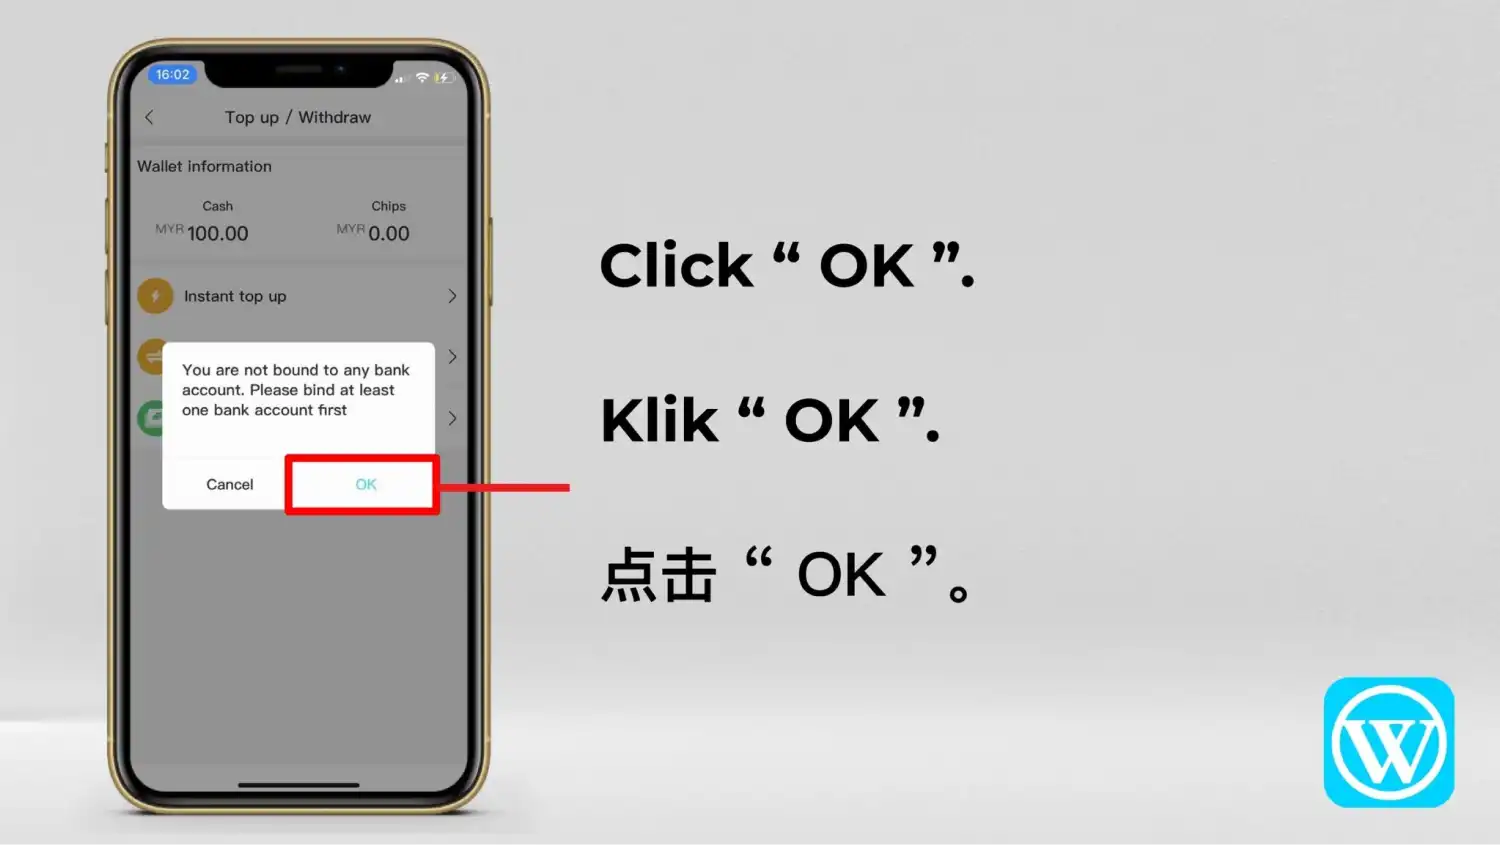
Steps 4 to 9 add a bank account. They appear in the screenshots because of the message in step 4, which says the account isn't bound to any bank account. If your account already has one, your screen may not show these steps; the screenshots don't cover that case.
Read the message, then tap OK
A message reads: “You are not bound to any bank account. Please bind at least one bank account first.” It has Cancel and OK buttons. Tap OK.
Open the bank list
The Add bank account screen asks for your own bank account and has Account name, Bank and Account No fields. The account name was already filled in, with a Change? link beside it. Tap the Bank field.
Next stays greyed out until the bank and account number are filled in.
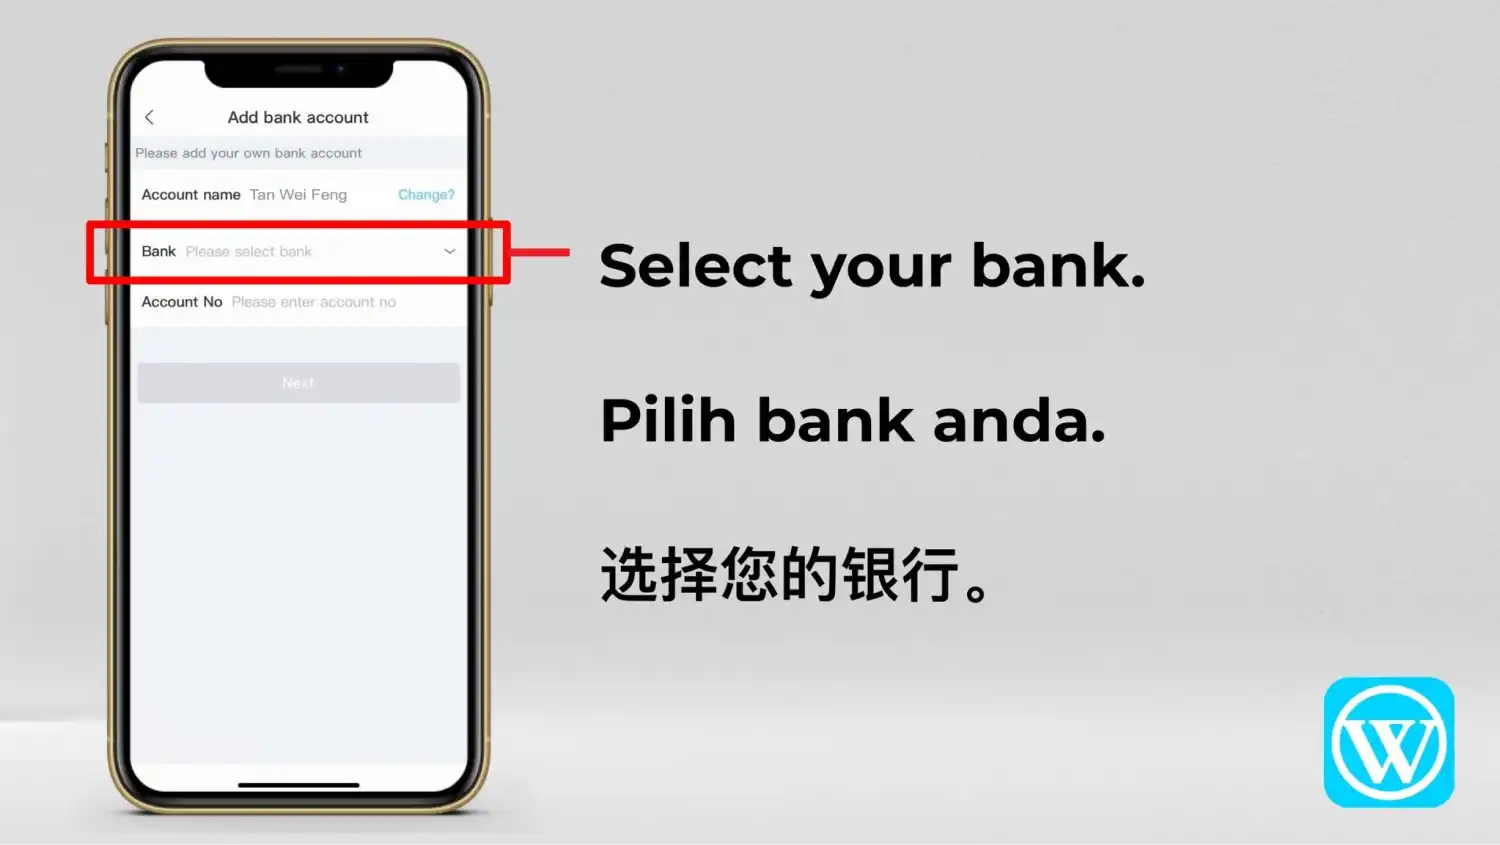
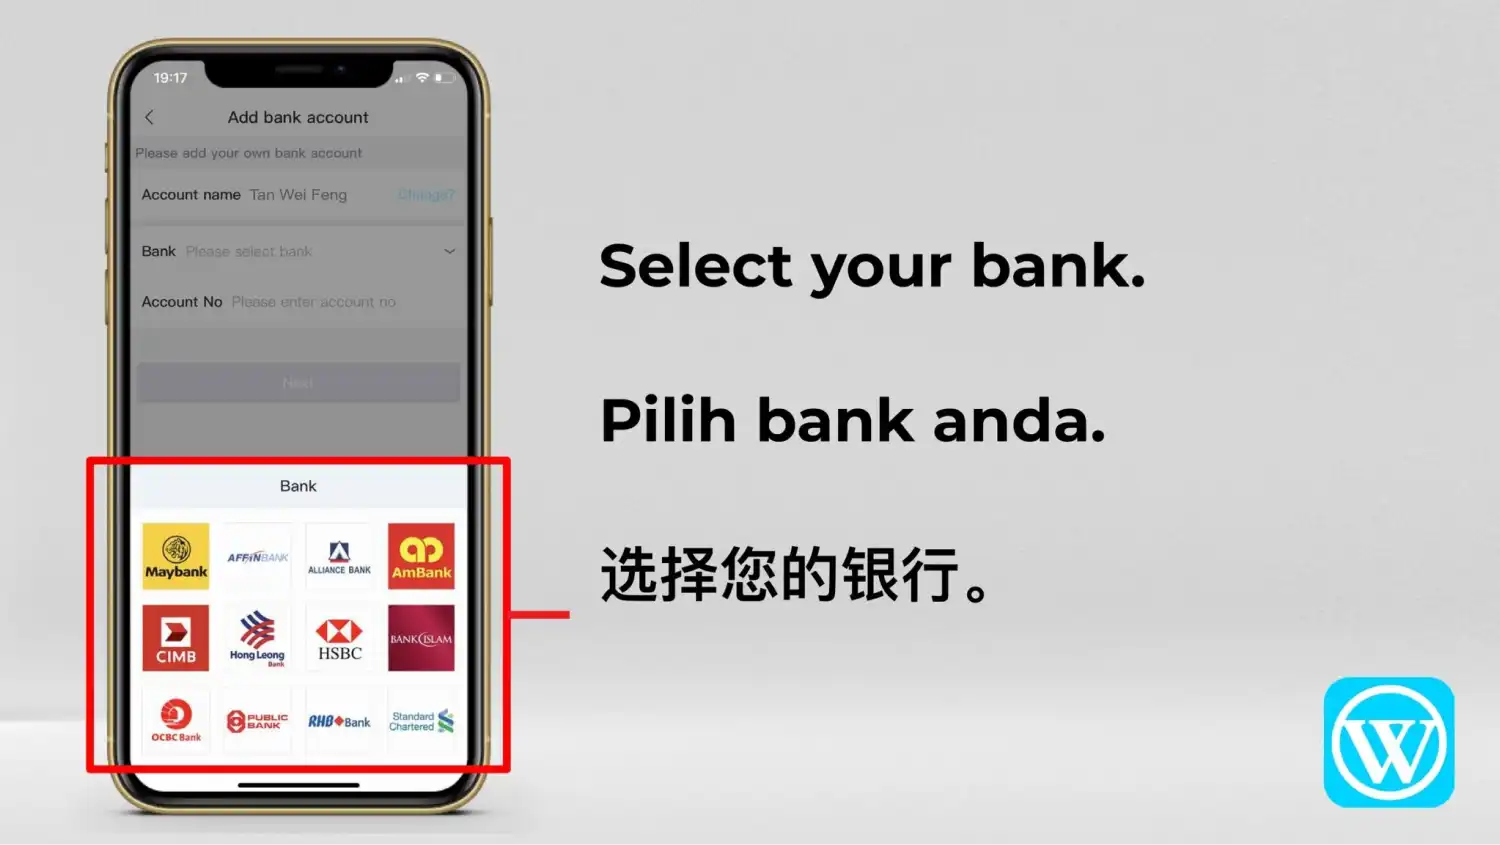
Select your bank
A Bank list opens as a grid of bank logos. Tap your bank.
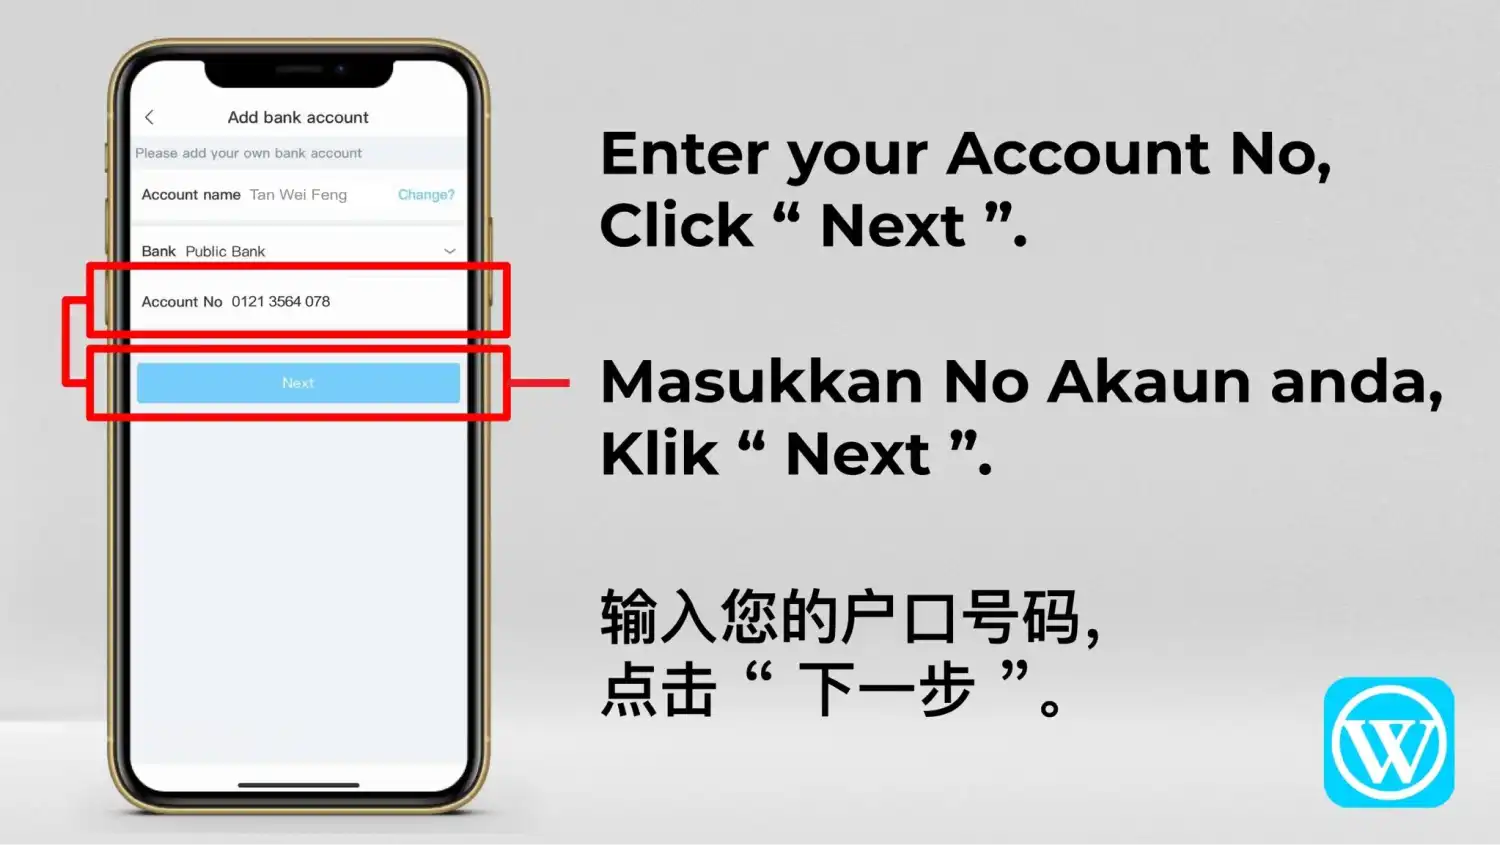
Enter your account number and tap Next
The bank you chose now appears in the Bank field (Public Bank in the example). Type your account number, then tap Next.
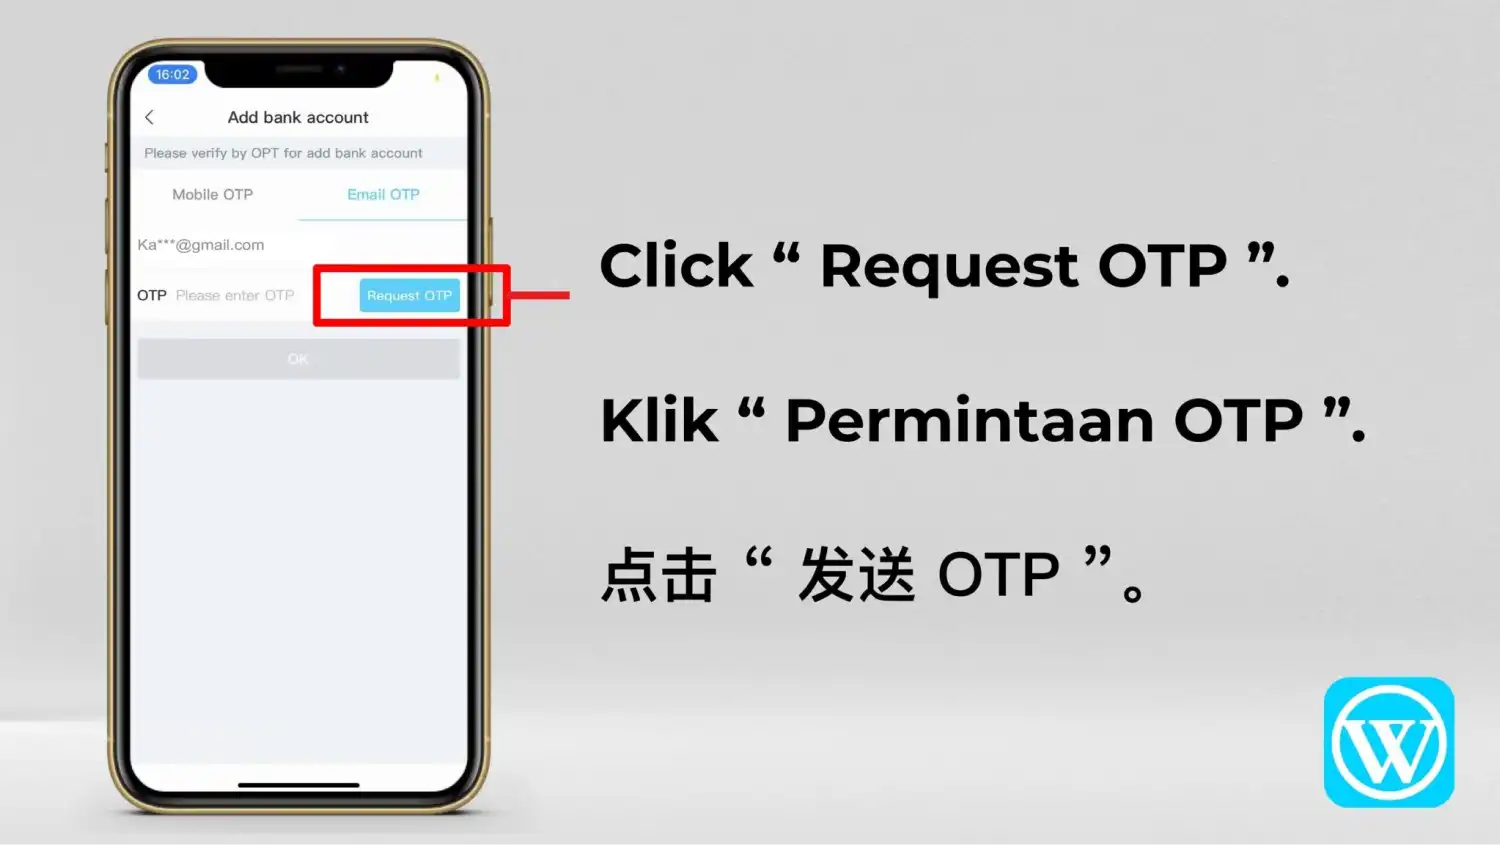
Request an OTP
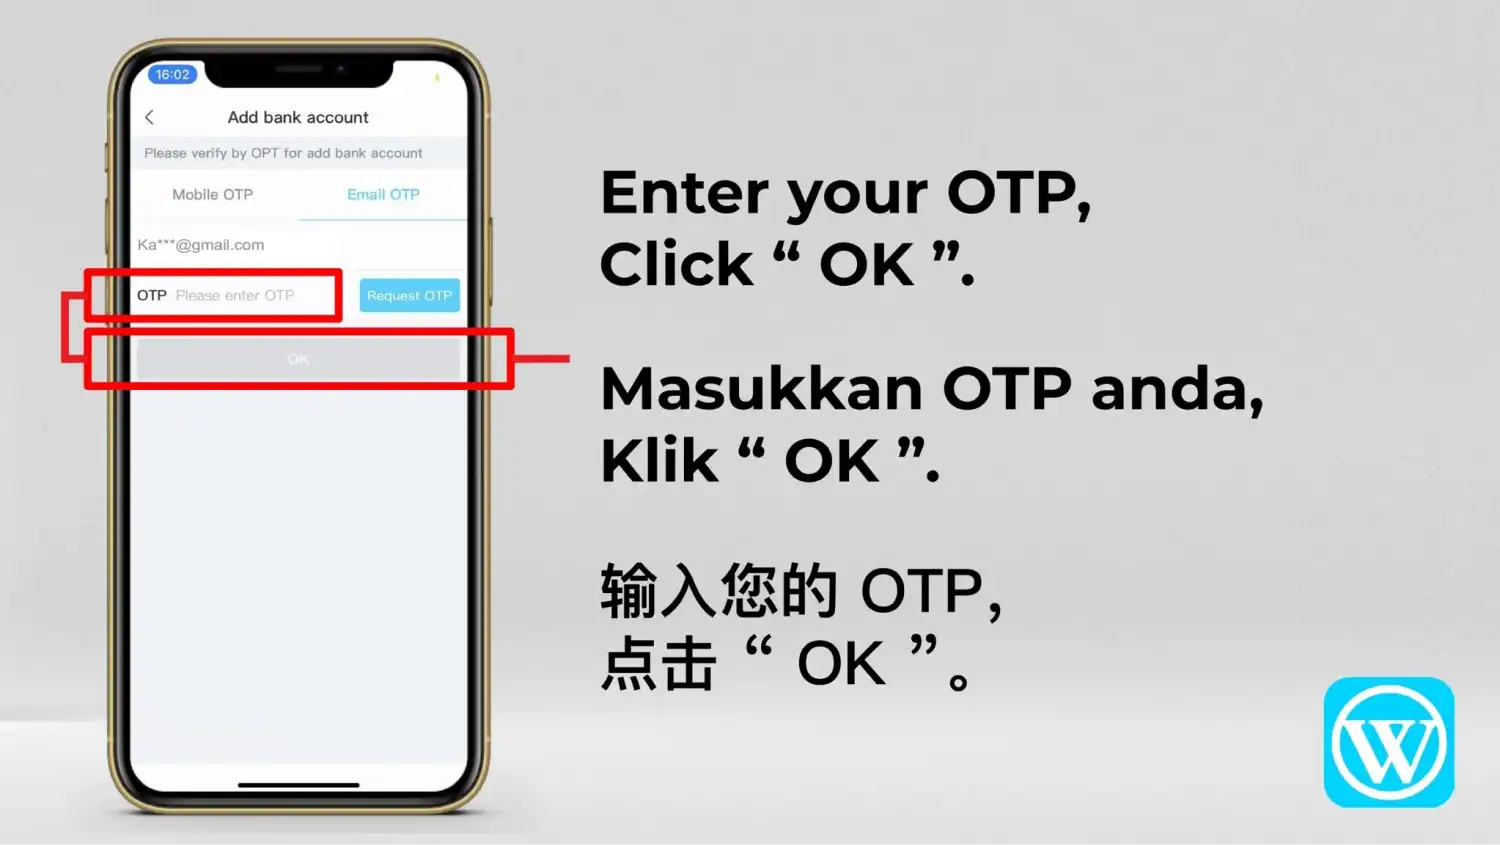
The screen asks you to verify with an OTP. It has Mobile OTP and Email OTP tabs; the example uses Email OTP and shows a masked email address. Tap Request OTP.
Enter the OTP and tap OK
Type the OTP into the OTP field, then tap OK.
Submit the withdrawal
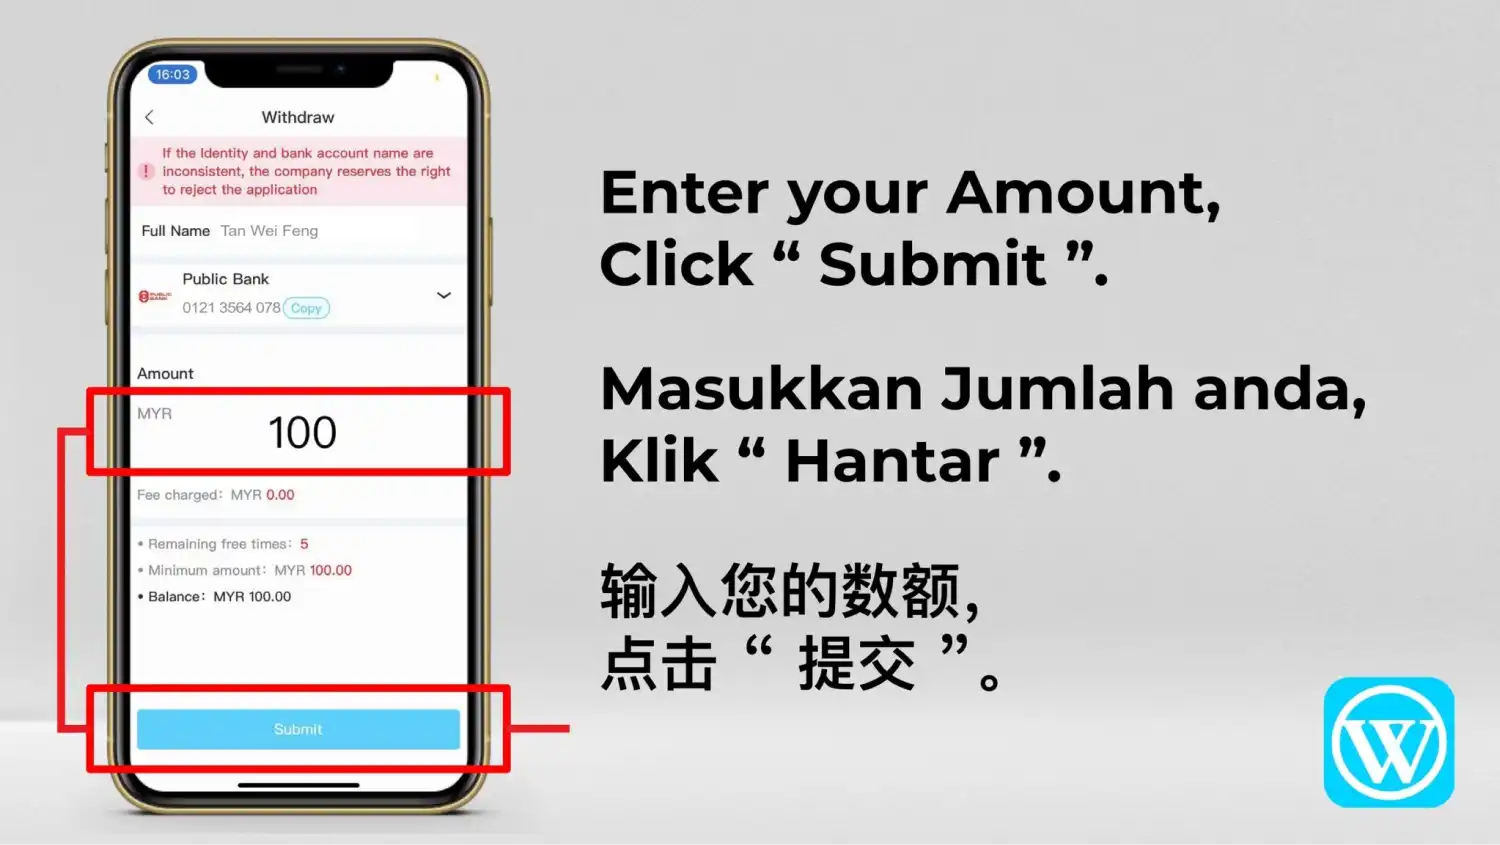
Enter the amount and tap Submit
The Withdraw screen shows your name, the bank and account number you added, and an Amount field (100 in the example). Below it are four lines: Fee charged (MYR 0.00), Remaining free times (5), Minimum amount (MYR 100.00) and Balance (MYR 100.00). Enter your amount and tap Submit.
A red notice at the top reads: “If the Identity and bank account name are inconsistent, the company reserves the right to reject the application.”
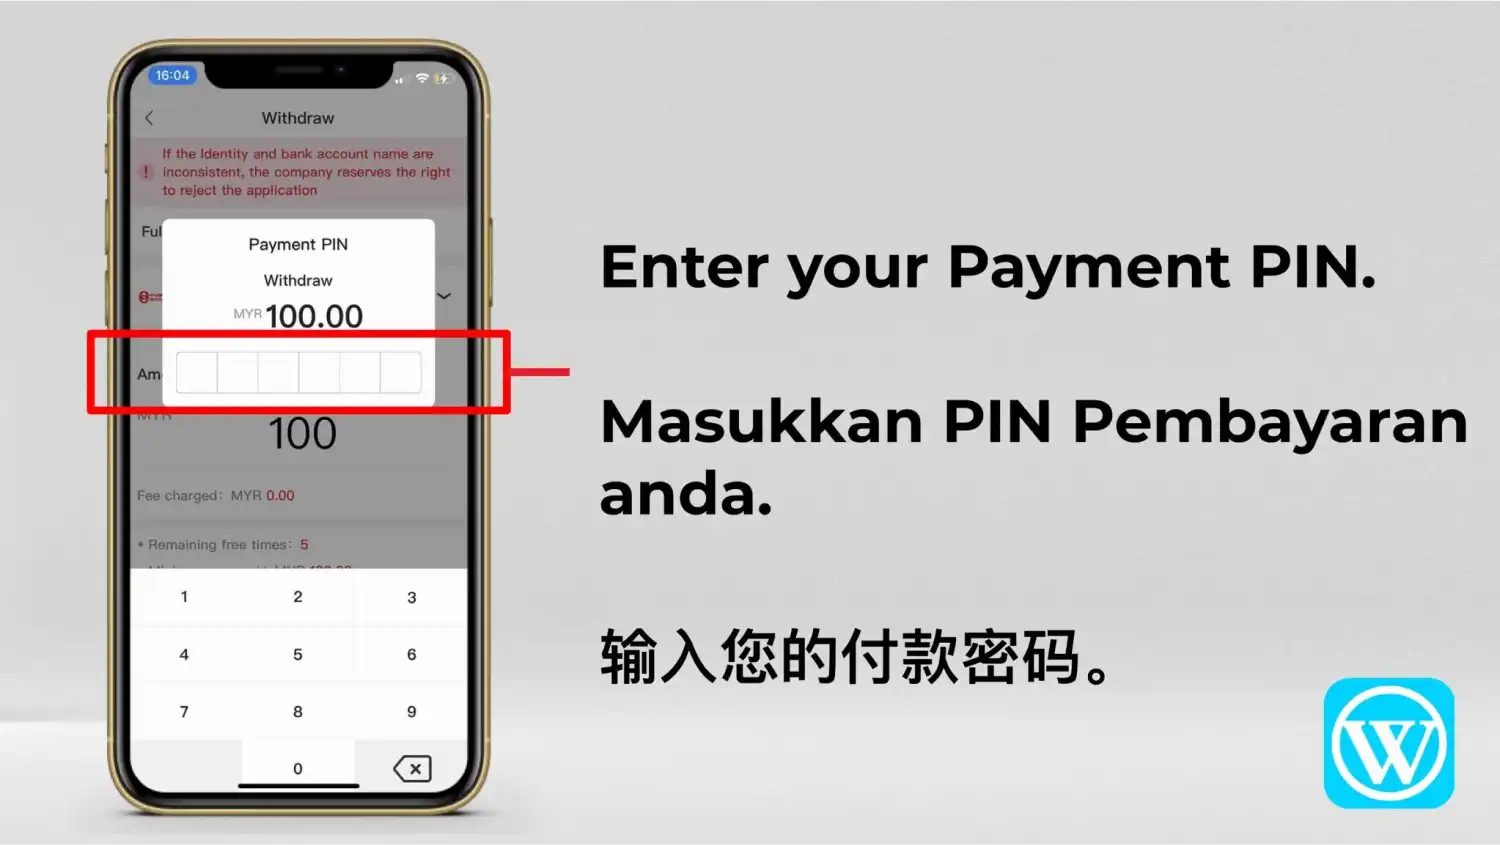
Enter your payment PIN
A Payment PIN box with six spaces opens over the amount (MYR 100.00 in the example). Enter your payment PIN. This guide doesn't cover how the PIN is set up.
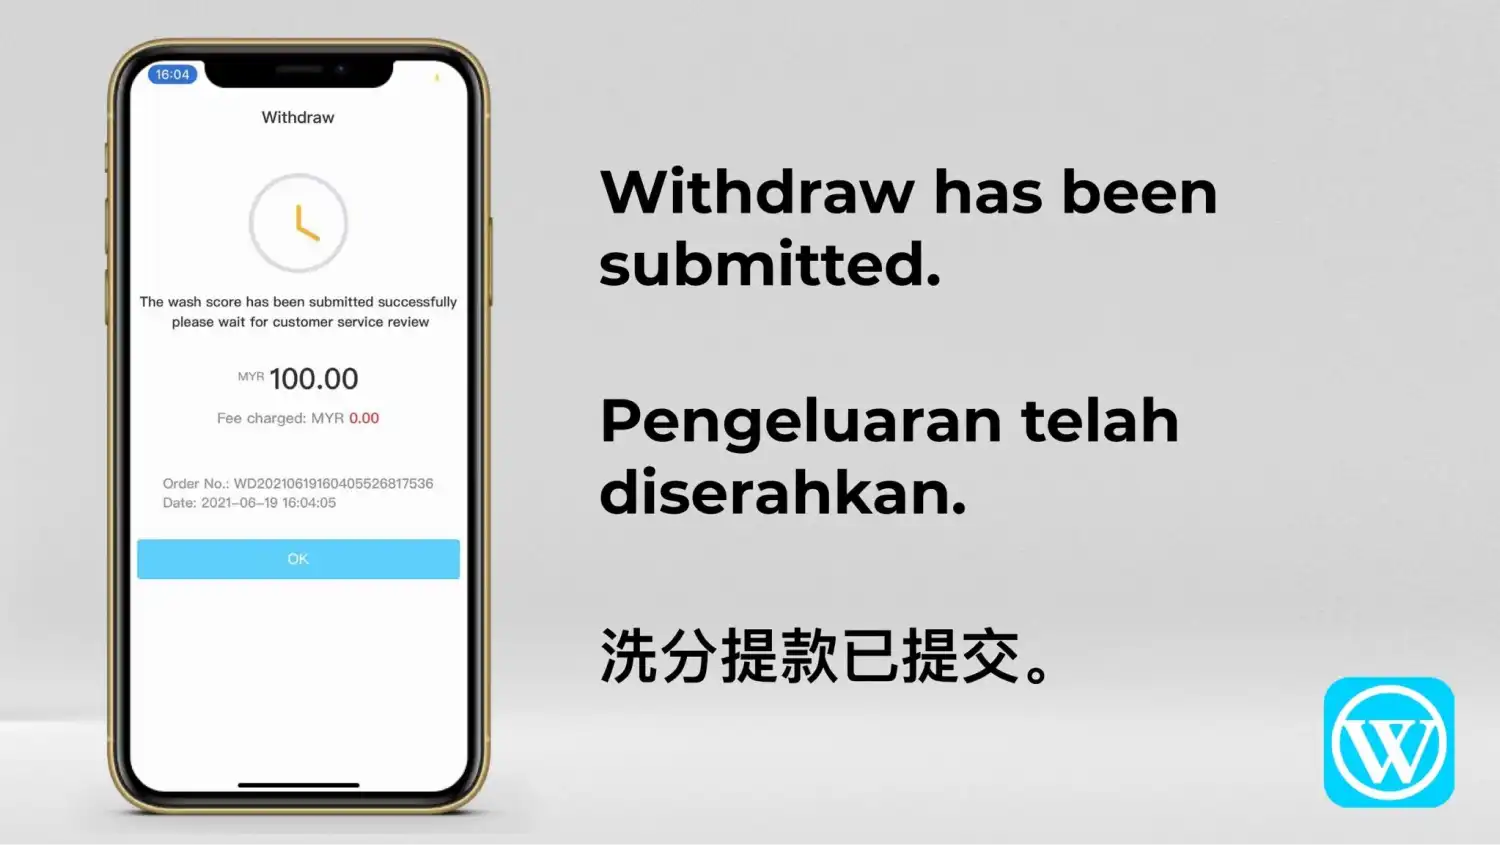
Check the submitted screen
A clock icon appears with a message that the request was submitted successfully and to wait for customer service review. It also shows the amount, the fee charged, an order number and the date. Tap OK.
Before you submit
A short check on the Withdraw screen in front of you:
- The amount is the one you meant, and it meets the minimum line shown on your own screen.
- The bank and account number shown are yours. The Withdraw screen carries a red notice about the identity and bank account name being consistent.
- The fee, remaining free times and balance lines say what you expect. The screenshot doesn't explain “remaining free times”.
- Anything on screen that differs from this guide. Follow the screen.
If your screen looks different
These screenshots are from 2021, and the app has changed since. The top-up screenshots on this site, taken in 2024, already show a different Me screen, with Withdraw and Bank Account as their own tools; see the top-up tutorial. If a label, a prompt or the order of screens doesn't match, follow the field labels, notices and instructions your own screen shows now, and don't force an old screenshot's steps onto it. If you use the Android app rather than a browser, that may also change what you see; the Winbox app download page covers installing it.
After you submit
The last screenshot shows a clock icon and says the request was submitted successfully and to wait for customer service review. That is a submitted state, not a confirmation that the money has arrived, and this guide doesn't say how long review or payment takes. Afterwards, follow the status or confirmation your current screen shows, and note the order number it displays. The game categories and the other tutorials are on the Winbox website.