
Winbox USDT Top Up Tutorial: Step-by-Step
Winbox calls it Top Up, and this page covers the USDT method only. The slides follow one route: open Top Up from the Me screen, choose USDT Topup, enter an amount, then send USDT by scanning a QR code or pasting an address. For DuitNow, E-Wallet, EZPay and WinPay, see the general top up tutorial.
- 15 numbered slides
- H5 version
- Captured in 2024
Before you top up
- Sign in first.The slides are labelled H5 version and start from the Me screen of a signed-in account. For browser access, H5 Winbox login is where that begins.
- Start from an account that exists.A new account starts at Winbox registration, before any of the steps below.
- Have a virtual currency platform ready.Steps 10 and 11 send the USDT from one. The slides don't name any, or say which ones work.
- Read the notice on the payment screen.The QR code and address it shows change periodically. Steps 12 and 13 explain.
Step-by-step USDT top up
The step numbers below are the ones printed on each slide. Steps 4, 12 and 13 are remark slides, marked Note.
Reach USDT Top up
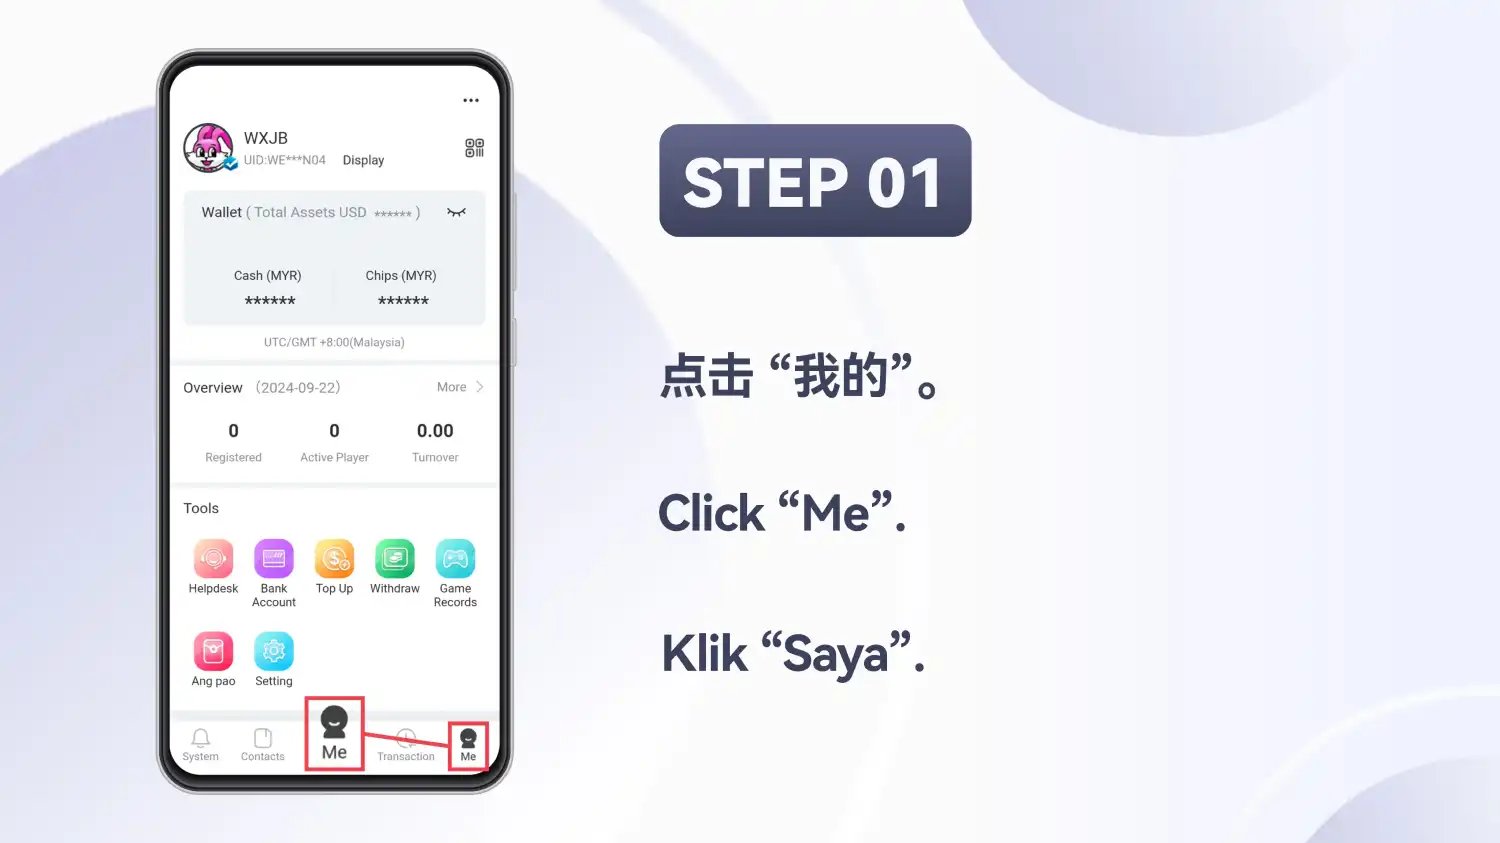
Tap Me
On the Winbox home screen, tap “Me” in the bottom bar. The slide marks it twice, once in place and once enlarged.
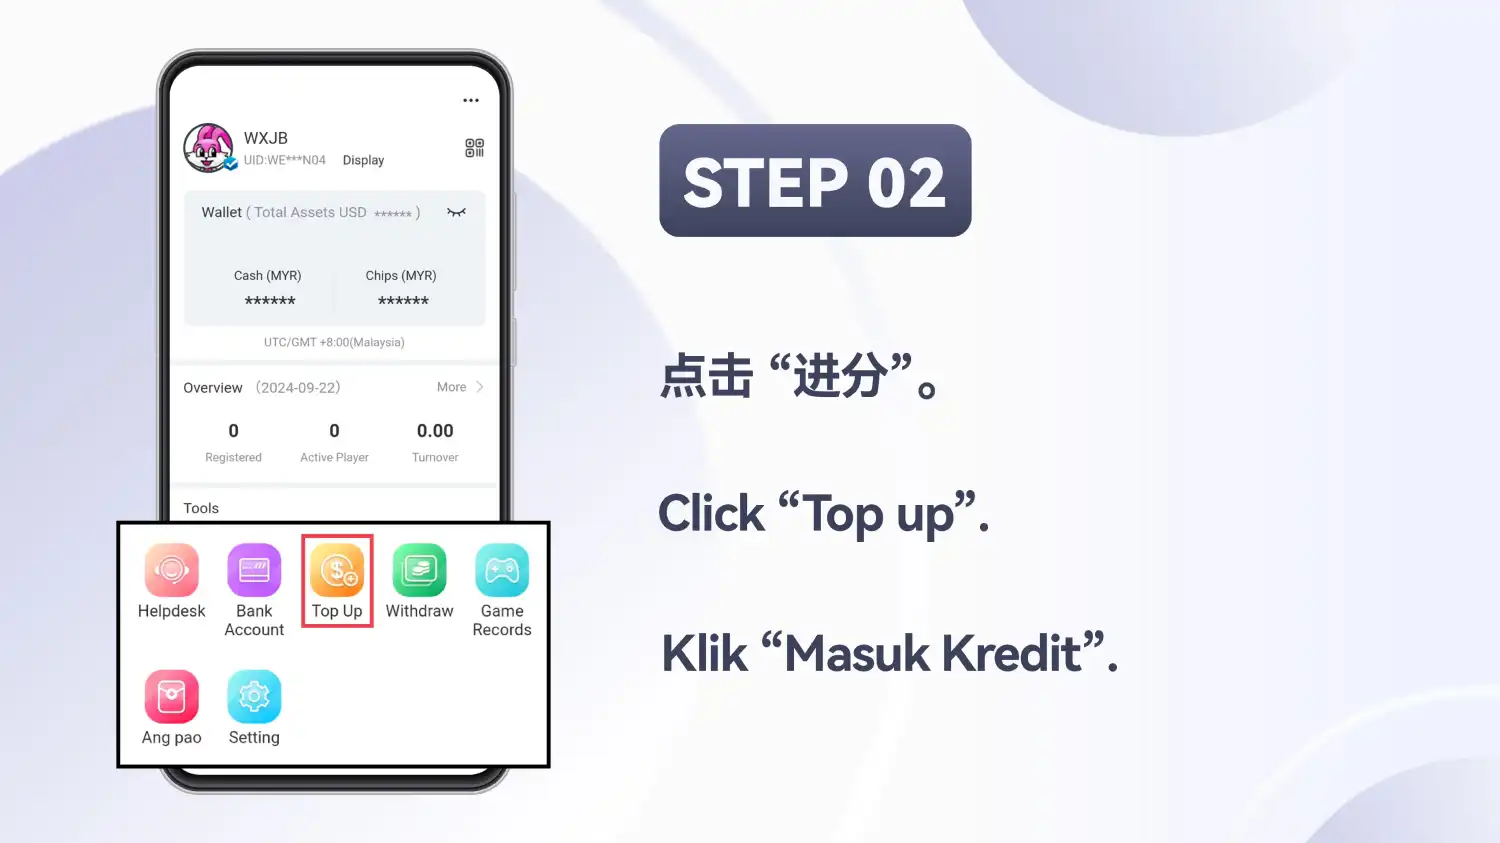
Tap Top Up
In the Tools panel, tap “Top Up”. The panel also lists Helpdesk, Bank Account, Withdraw, Game Records, Ang pao and Setting.
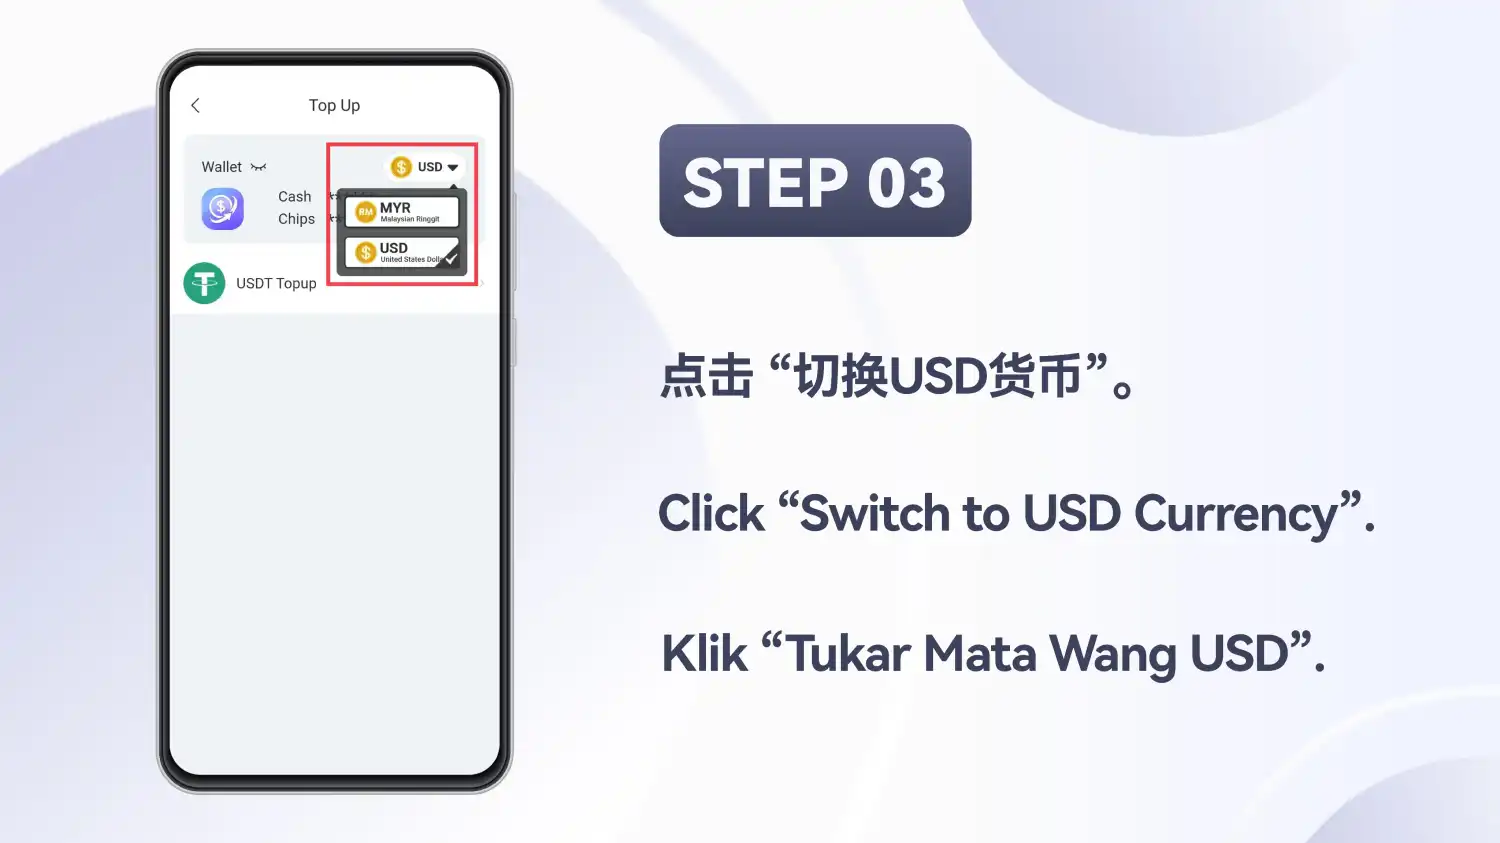
Switch to USD Currency
On the Top Up screen, open the currency selector at the top right of the Wallet panel. It lists MYR (Malaysian Ringgit) and USD (United States Dollar), with USD ticked on the slide. Click “Switch to USD Currency”.
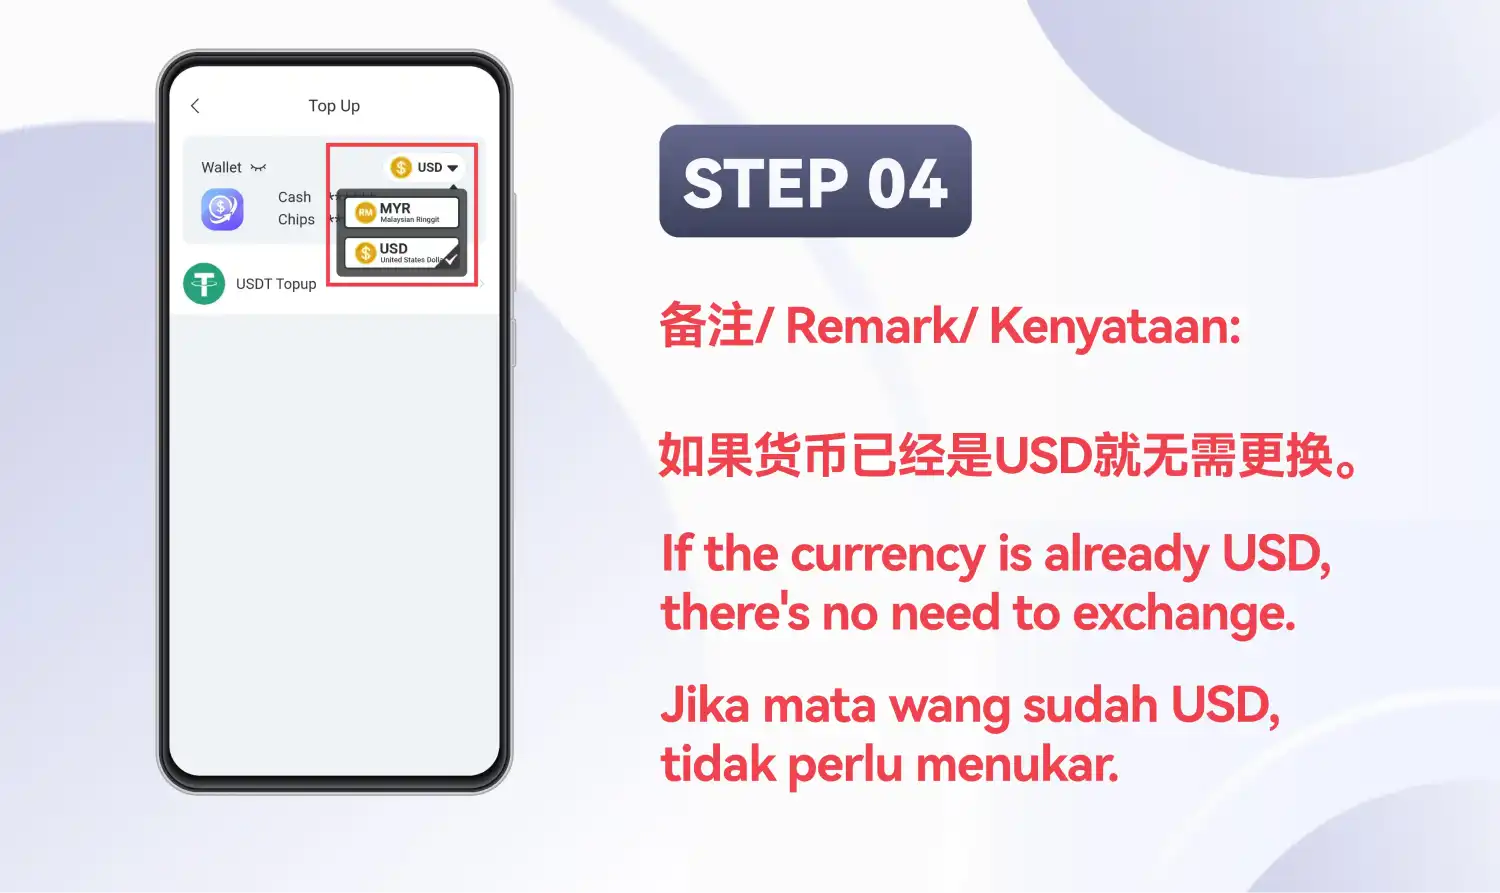
NoteAlready on USD? Skip the switch
The slide’s remark reads: if the currency is already USD, there’s no need to exchange. Go straight to the next step.
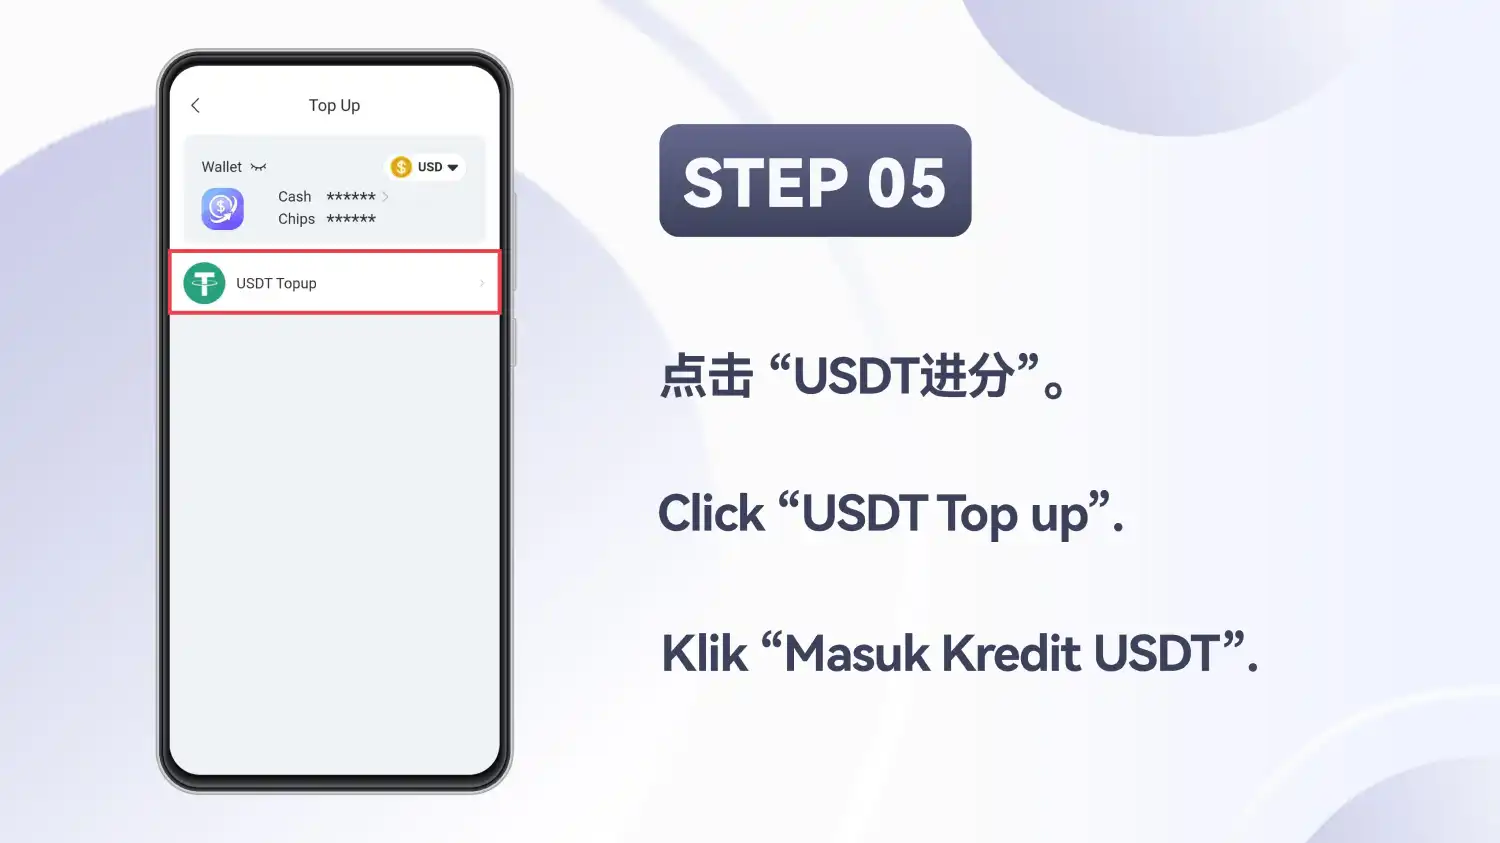
Tap USDT Top up
With USD selected, the Top Up screen shows a single row named “USDT Topup”, marked with the green Tether icon. Click “USDT Top up”.
Enter the amount
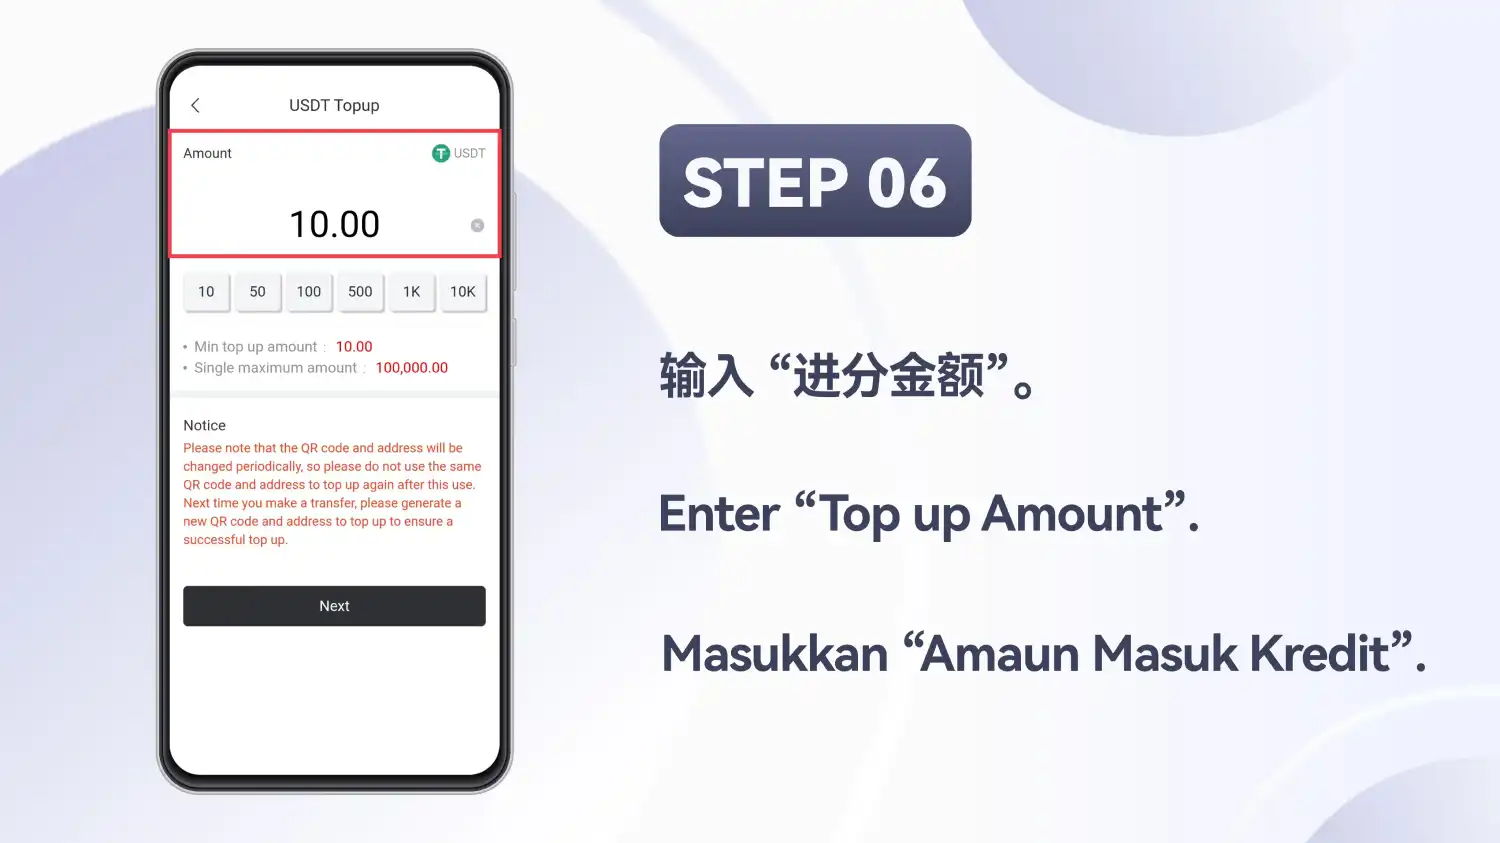
Enter the Top up Amount
On the USDT Topup screen, fill in the “Top up Amount”. The field is in USDT and shows 10.00 on the slide, with shortcut buttons for 10, 50, 100, 500, 1K and 10K.
This example screen also lists a minimum top up amount of 10.00 and a single maximum of 100,000.00, above a red notice about the QR code and address. Those are the values on that screen, not rules stated here. Read the ones on your own.
Tap Next
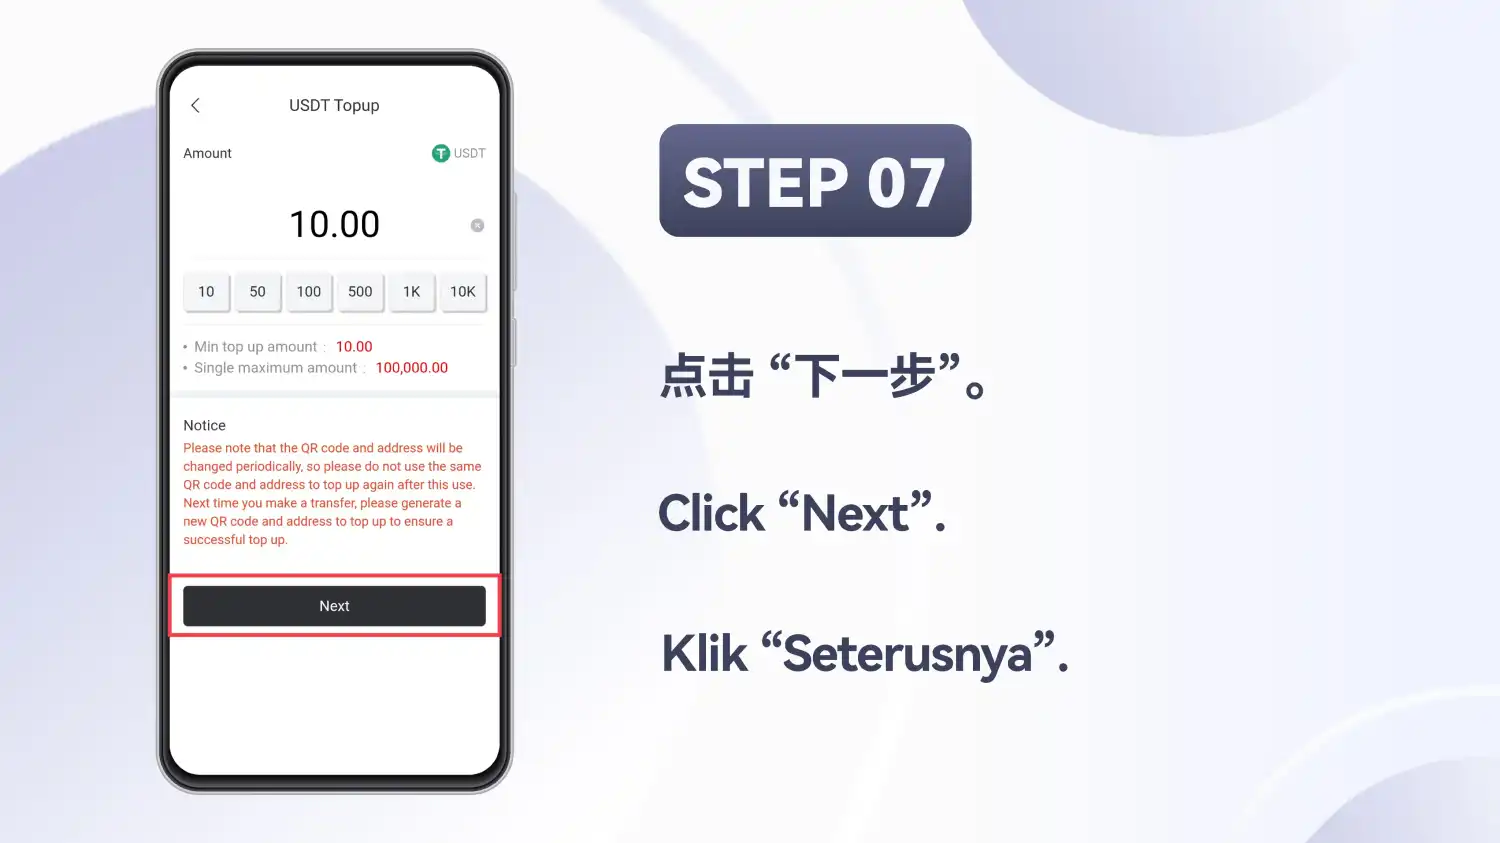
Tap “Next”, the dark button at the bottom of the same screen.
Send the USDT
Check the payment network
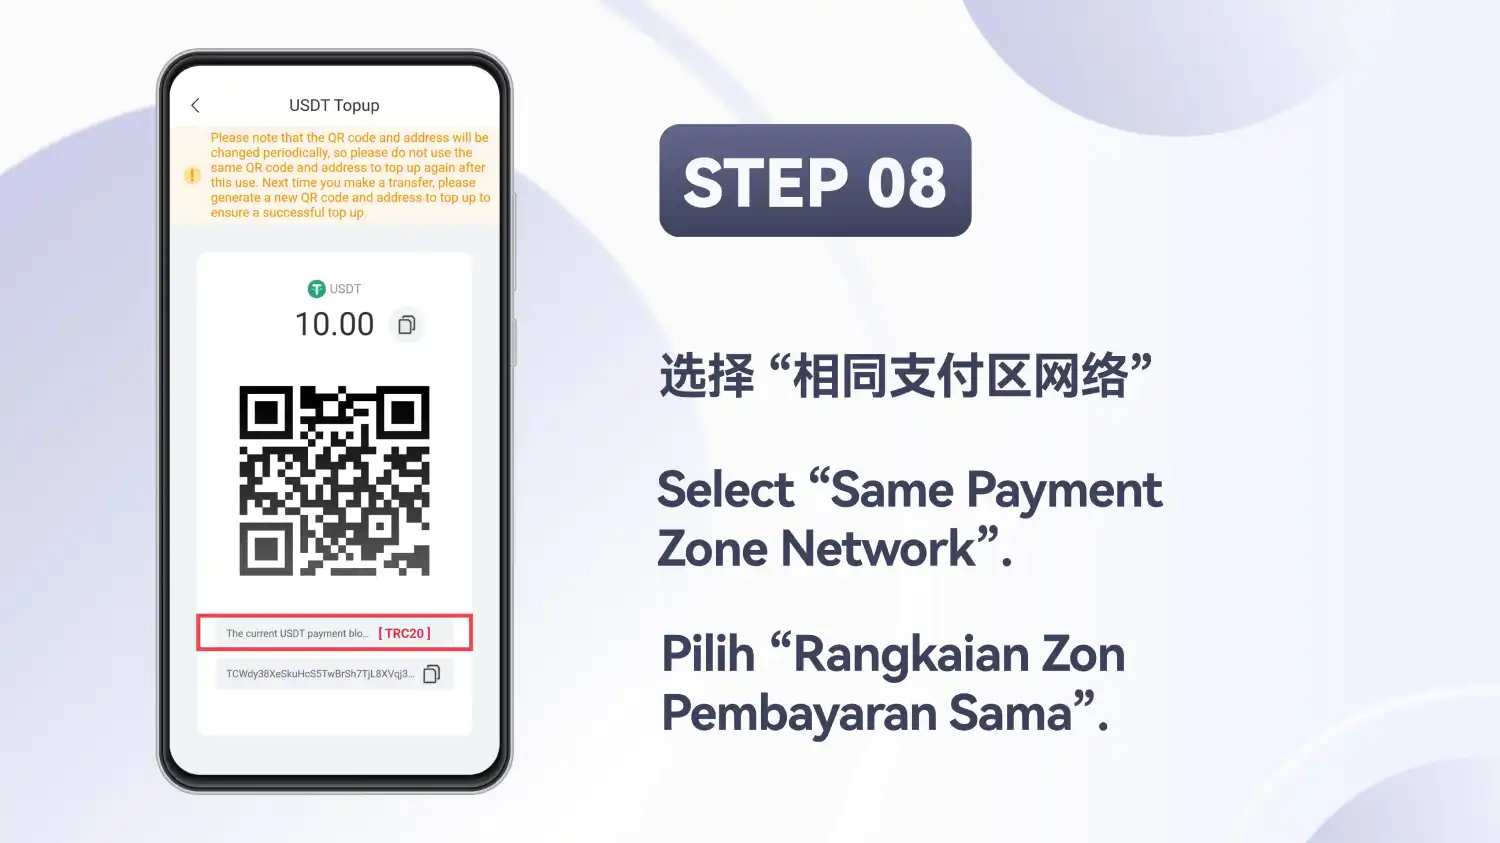
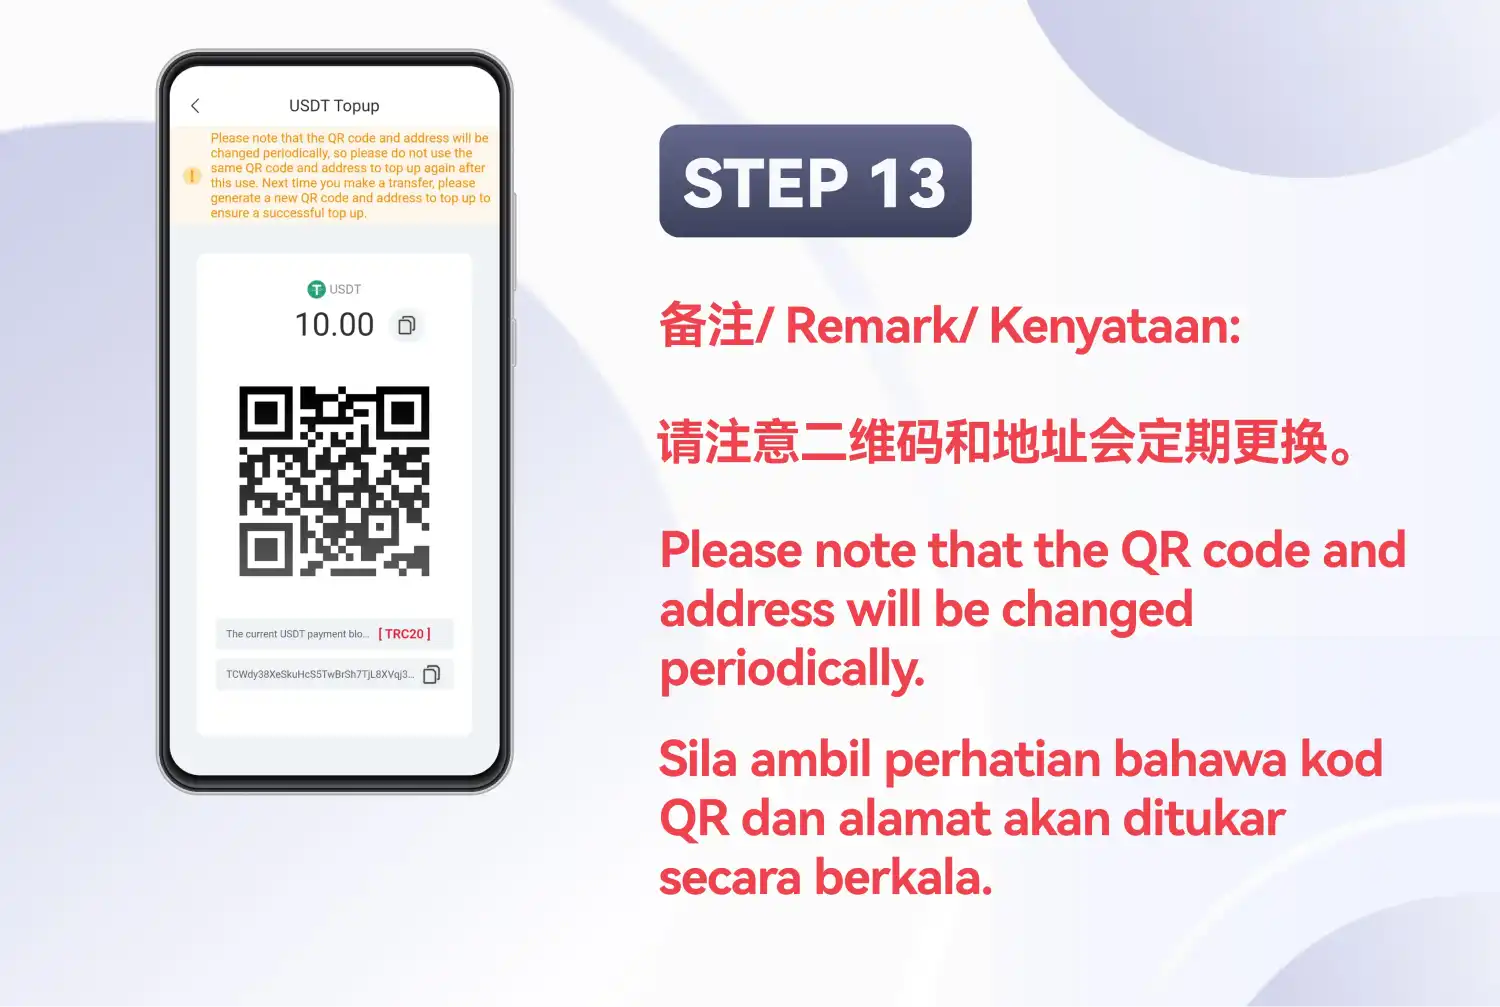
The next screen shows the amount, a QR code and a USDT address. The line outlined in red names the network for this payment: [TRC20] in the example, with the rest of its label cut off on screen.
The slide’s instruction reads “Select Same Payment Zone Network”, so the network you send on should be the one this screen shows. The example doesn’t establish that TRC20 is the only one.
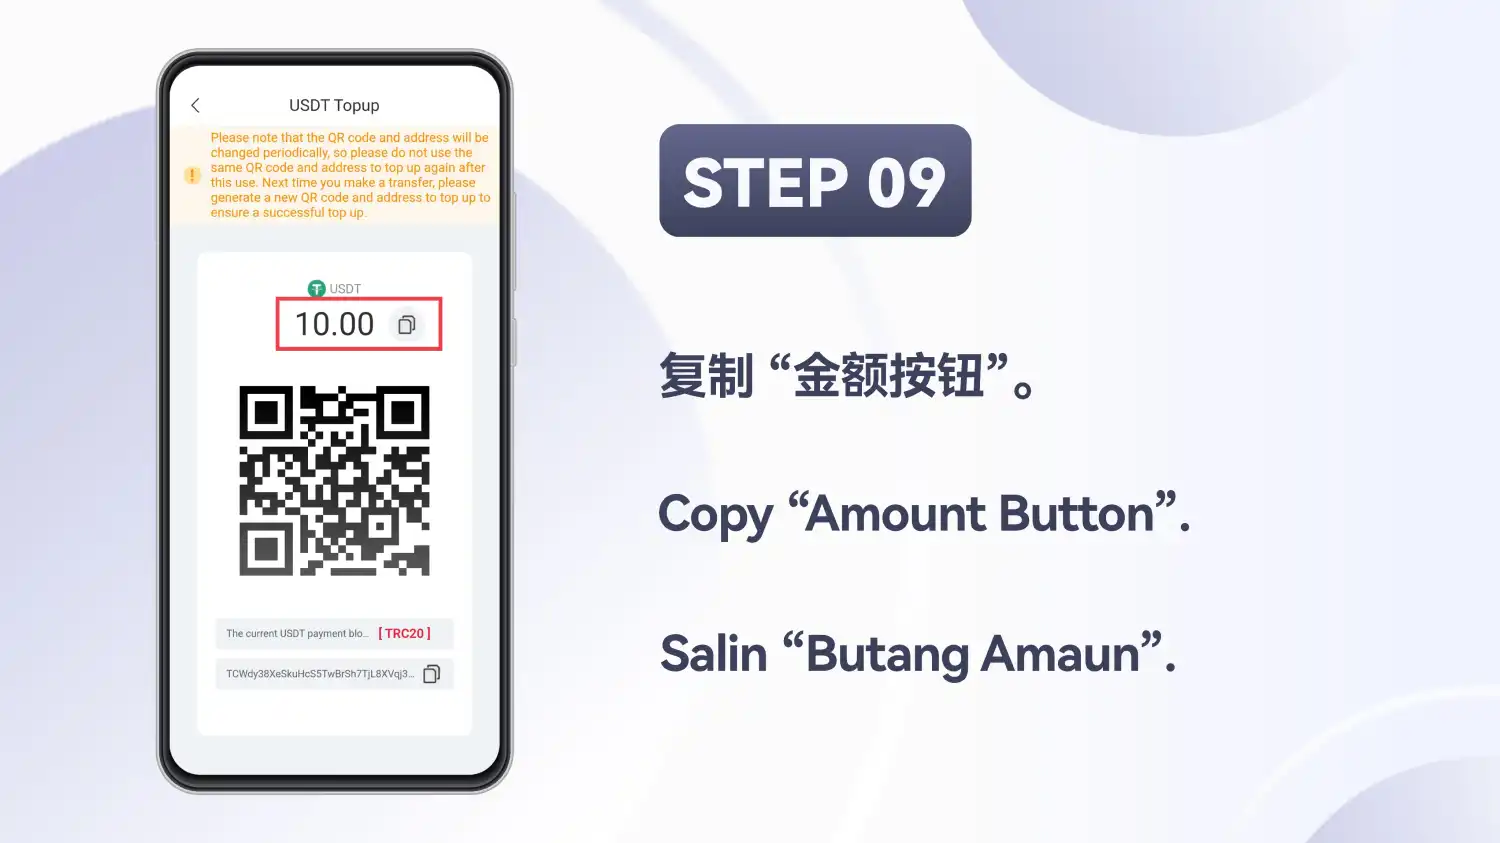
Copy the amount
Tap the copy button beside the amount, the “Amount Button”. It is 10.00 in the example.
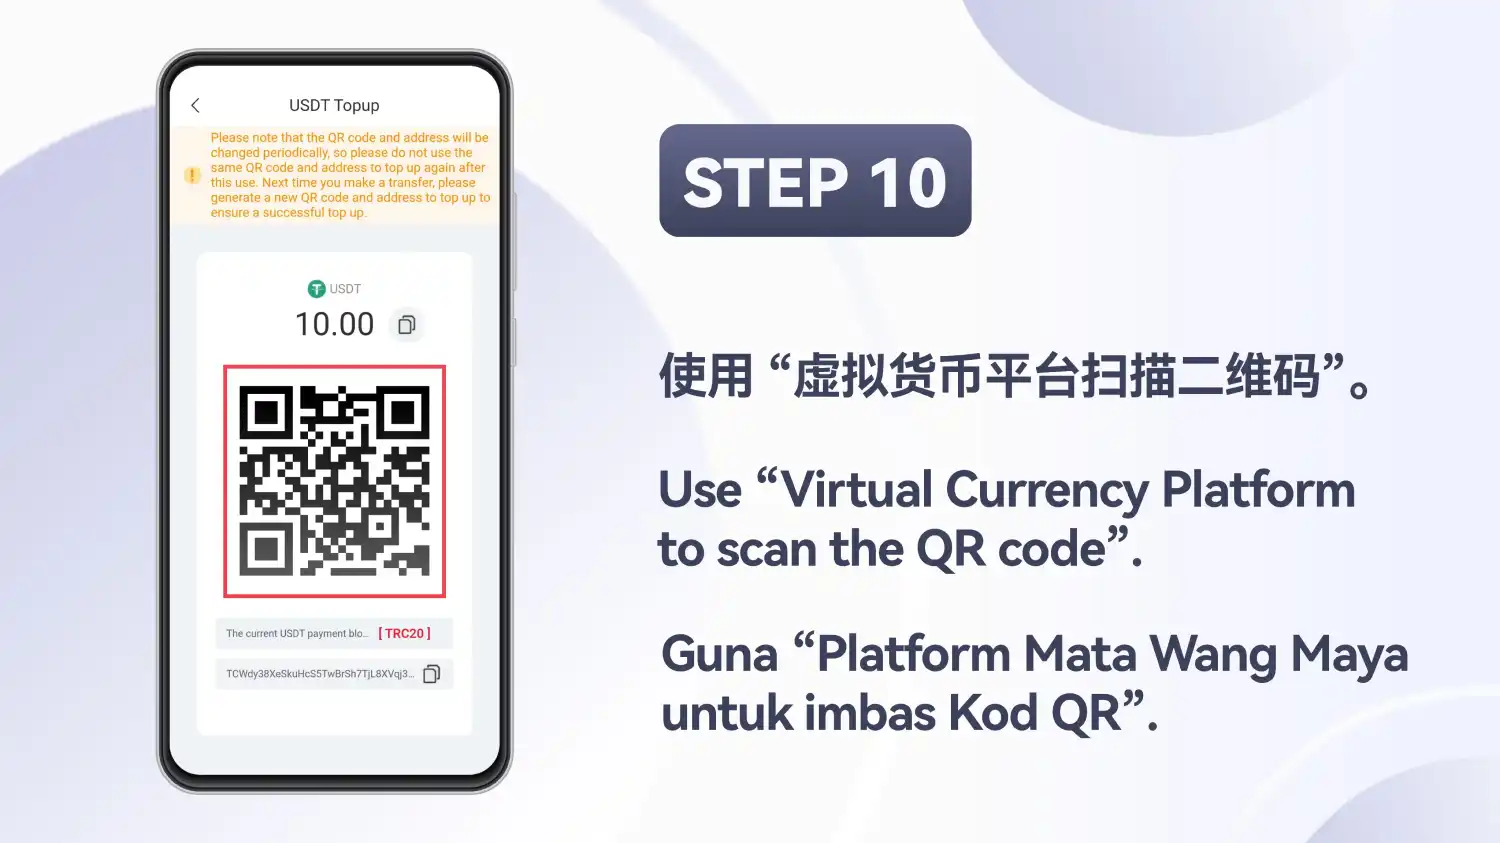
Scan the QR code
Use the “Virtual Currency Platform” to scan the QR code on this screen. The slide doesn’t name a platform or show its scanner.
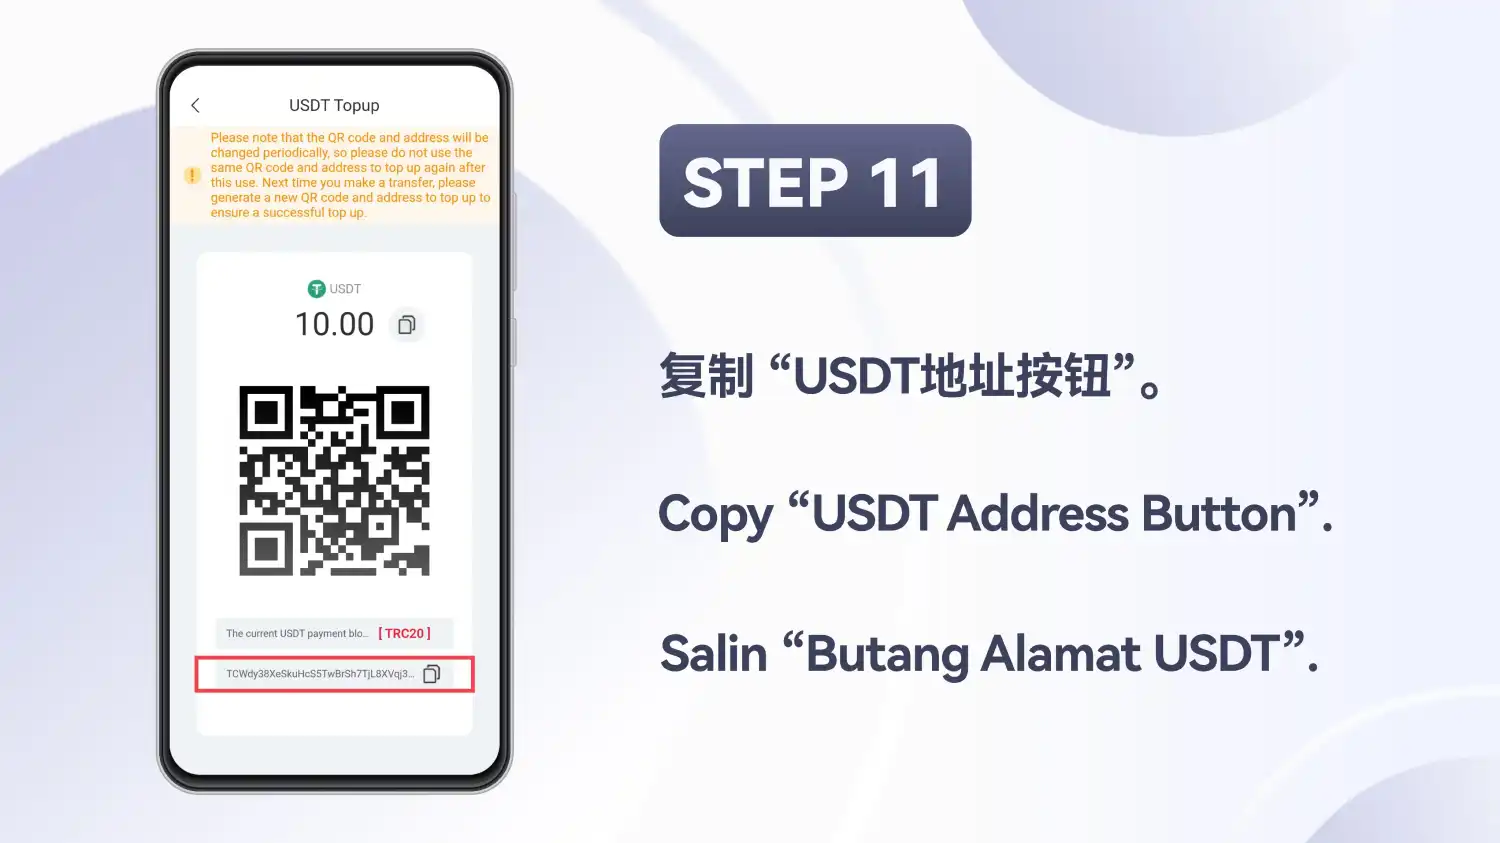
Copy the USDT address
Or tap the copy button beside the address, the “USDT Address Button”. The address is shortened on screen, and the example address isn’t repeated here.
NoteScan or copy: your choice
The slide’s remark says you can either scan the QR code or copy the USDT address for the transfer to the virtual platform. Steps 10 and 11 are two ways to do the same thing.
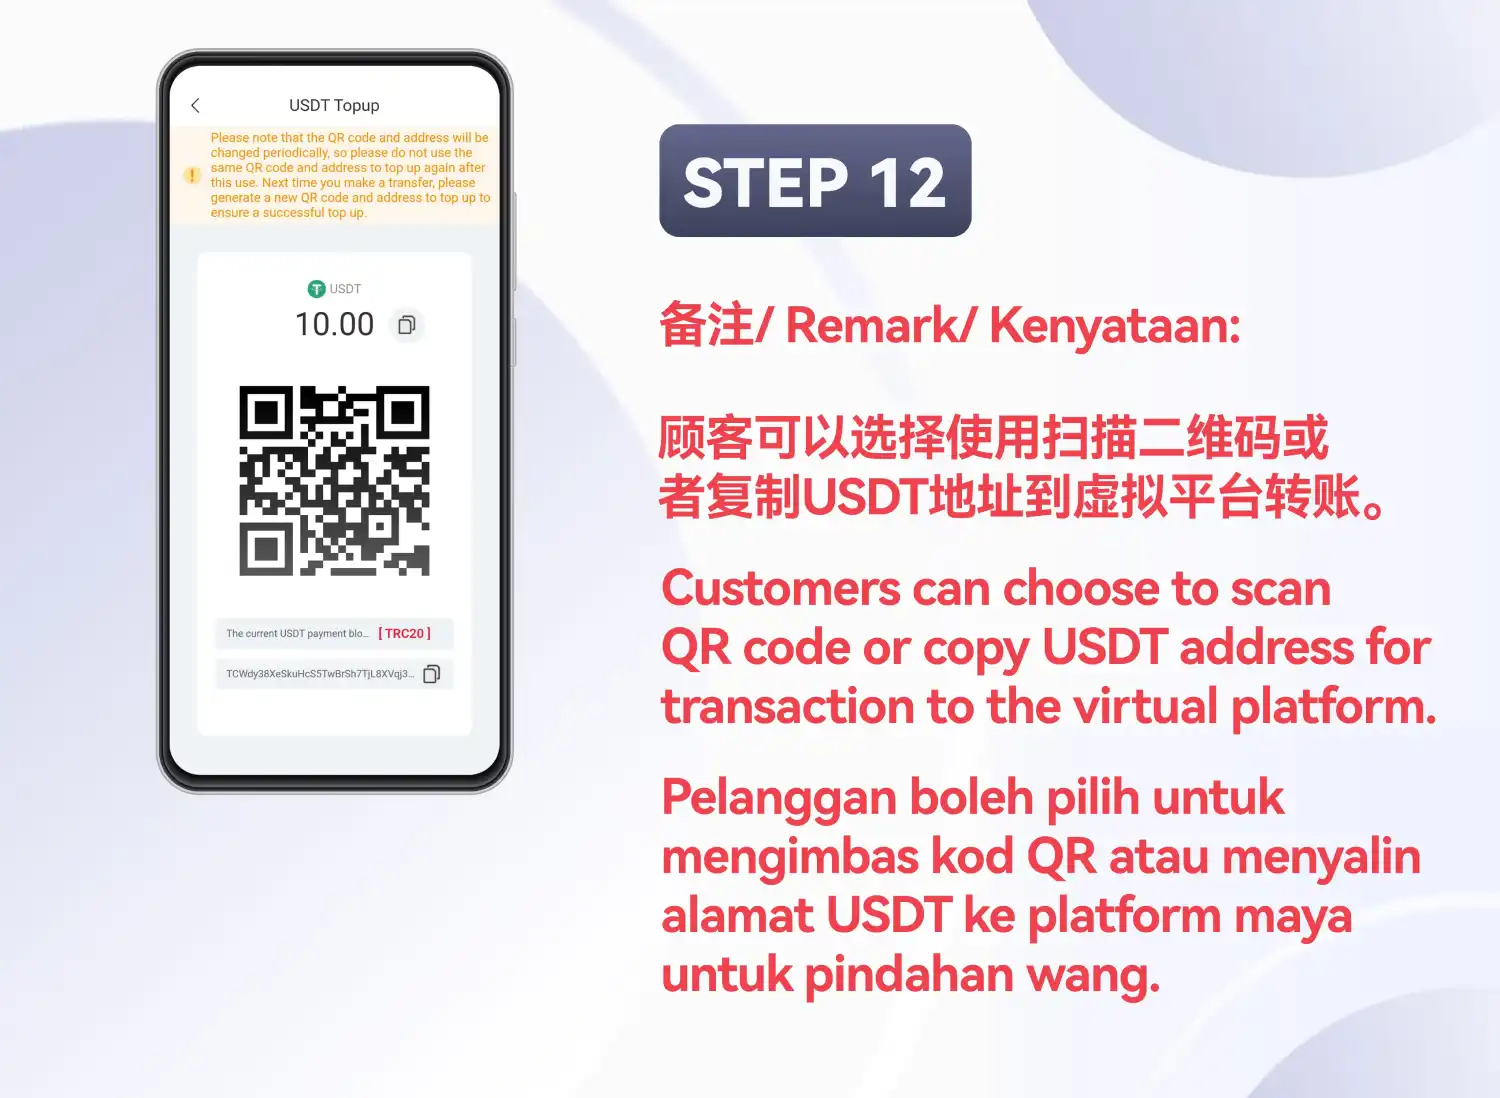
NoteThe QR code and address change
The slide’s remark, and the orange notice at the top of the screen, say the QR code and address are changed periodically. Don’t reuse the same QR code and address for another top up after this one. Generate a new pair next time.
Read the order details
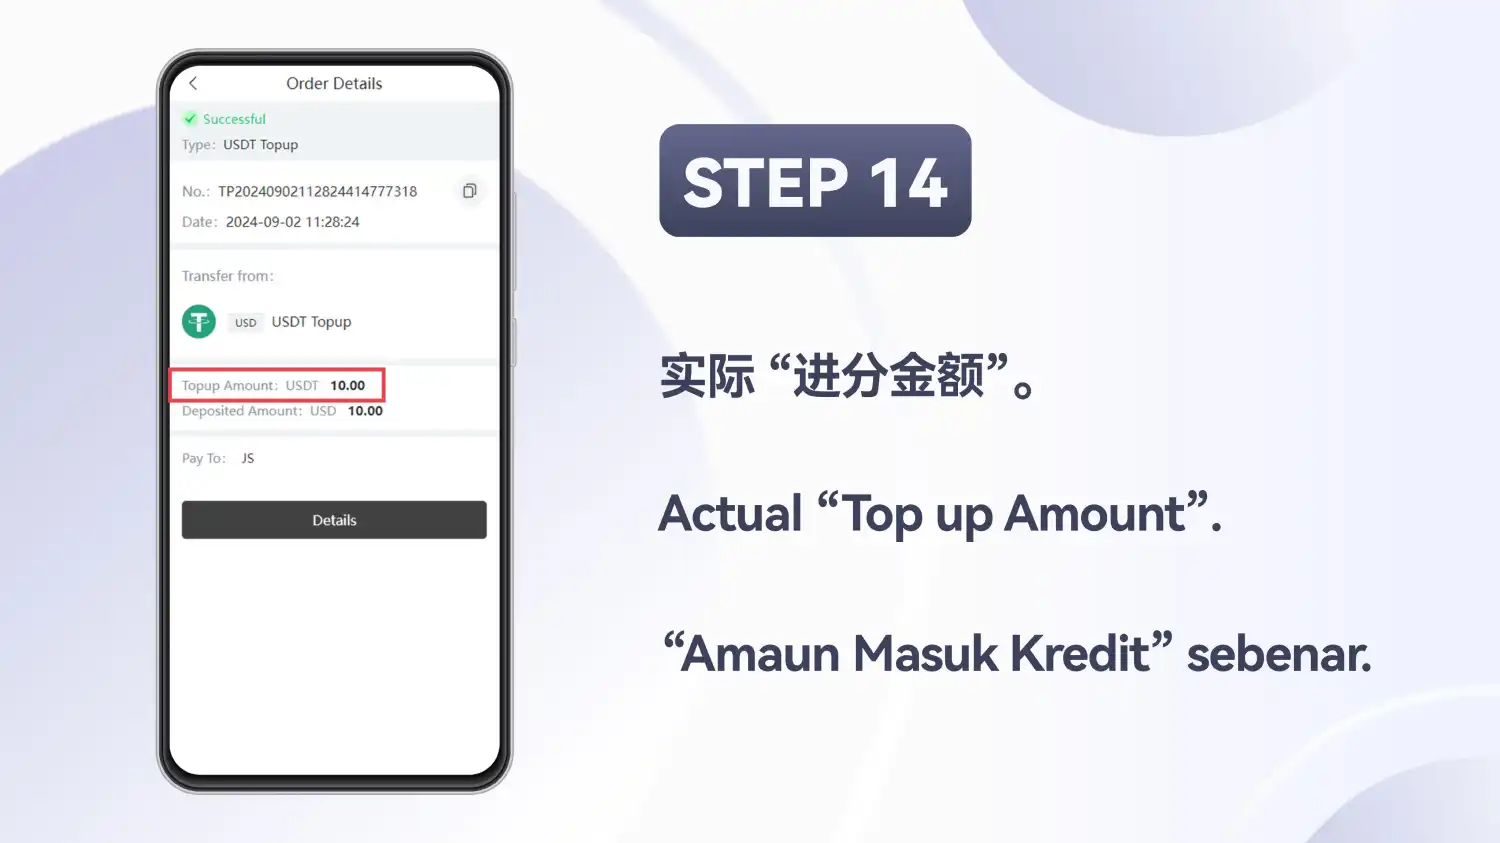
Read the Top up Amount
The Order Details screen shows Successful, the type (USDT Topup), an order number and a date. The slide marks “Top up Amount”, USDT 10.00 in the example.
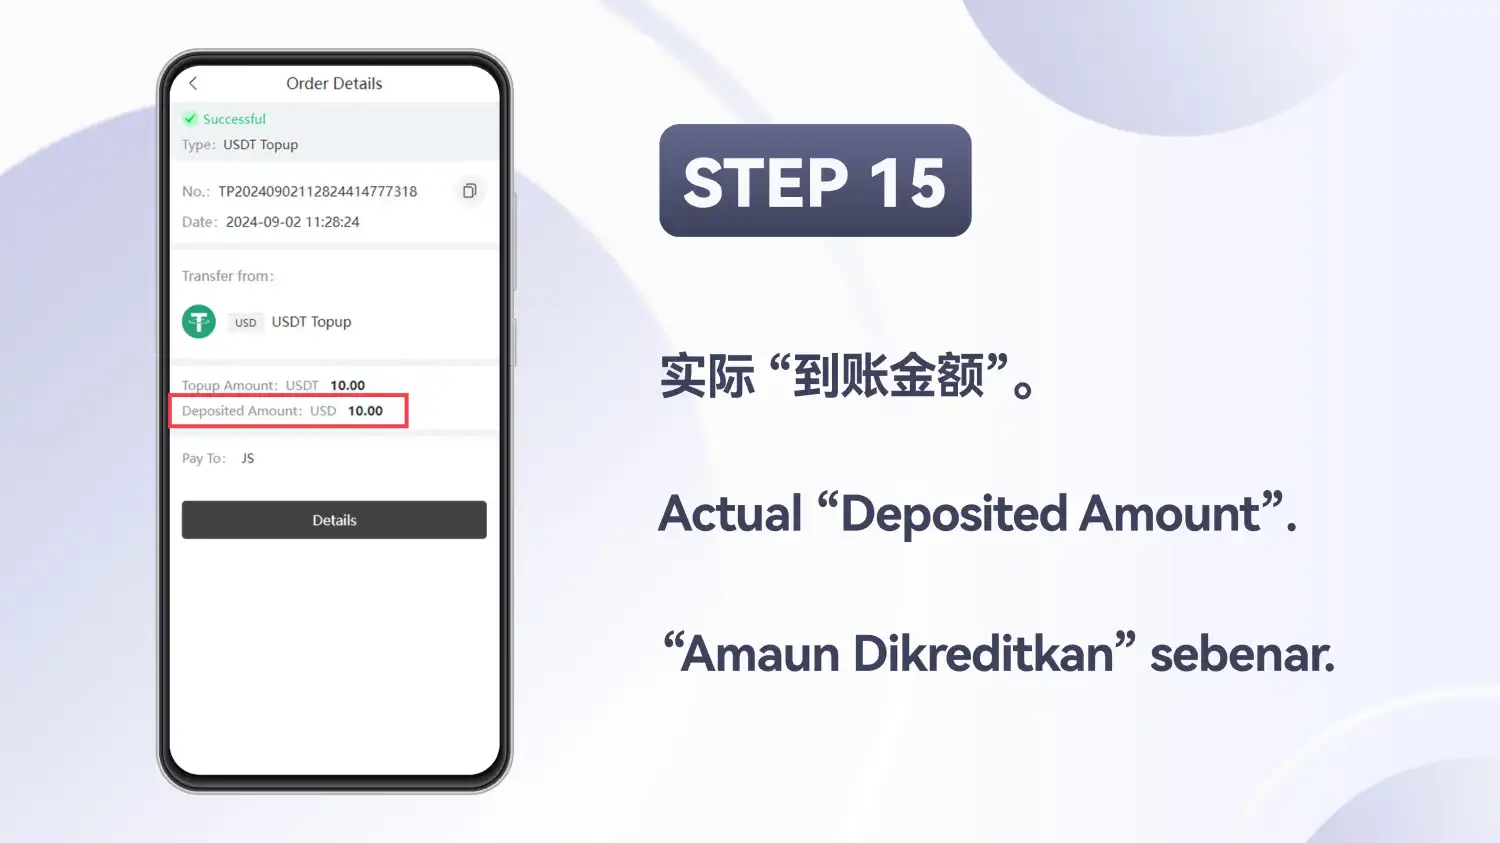
Read the Deposited Amount
One row below is “Deposited Amount”, USD 10.00 in the example. Both rows read 10.00, labelled USDT and USD, but this tutorial doesn’t state a rate or how the two are related.
Before you transfer
A short check against the payment screen in front of you:
- The amount you send is the amount the screen shows. It has a copy button beside it.
- The network you send on is the one the payment screen names (TRC20 in the example).
- The QR code and address are the ones on the screen you are looking at now, not ones saved from an earlier top up.
- You use one method, scanning the QR code or pasting the address. The slides show both, and either works as the remark describes.
After you transfer
The last two slides show the Order Details screen. Row by row, with what it leaves open:
- Status and type
- Successful, and the type USDT Topup.The slide doesn’t say how long the top up took to reach that state.
- Order number and date
- An order number with a copy button, and a date and time.The number belongs to that order and isn’t reproduced here.
- Transfer from
- USD next to USDT Topup.It isn’t explained beyond that label.
- Top up Amount and Deposited Amount
- USDT 10.00, then USD 10.00.There is no exchange rate, fee or conversion rule on the slide.
- Pay To and Details
- A short Pay To value and a dark Details button.The Details button isn’t part of the numbered steps and isn’t explained.
If your screen looks different
The slides are labelled H5 version, and the dates visible on them are from 2024. Each caption is given in Chinese, English and Malay; this page follows the English one. If you use the Android app rather than a browser, that may change what you see, and the Winbox mobile app page covers installing it. Follow the labels and figures your own screen shows.
What this tutorial doesn't establish
- Any network other than the one visible in the example
- A minimum or maximum that applies to every account
- A fee or an exchange rate
- How long a top up takes, or how many confirmations it needs
- Which virtual currency platforms can be used
- How long a QR code or address stays valid
Next
Moving USDT out of your account is a separate flow, in the USDT withdrawal tutorial. Once a top up shows in your account, slots, live casino, sports and 4D are all reached from Winbox Malaysia's homepage.